Invoice Profiles
White labelling lets you present Uboss as your own brand. For billing, that means every document your customers receive carries your company name, support email, terms and logos.
Invoice Profiles control how your invoices look and what information they include. You can create different profiles to suit different needs or customers. In this example, we’ll set up a general manual invoice profile and an automatic invoice profile.
At Home level, go to the Billing Menu on the left hand side and search and select Invoice Profiles. On the next page, press  and we will now add a manual profile.
Manual Invoice Profile
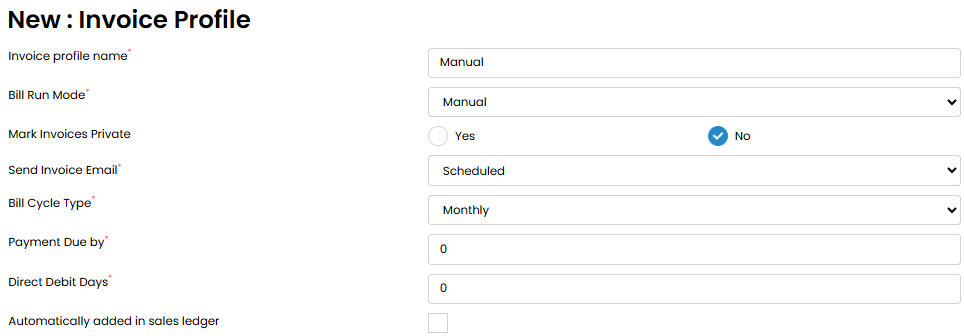
Enter the Invoice Profile Name, select Manual for the Bill Run Mode; Invoice don’t need to be marked private as they won’t be sent until you send them so leave the Mark Invoices Private as No; Bill Cycle Type can only currently be Monthly.
Payment Due by and Direct Debit Days (if they pay by DD) are normally set to 14. Tick the Automatically added in sales ledger box if you use Uboss Sales Ledger (see separate guide on Sales Ledger).
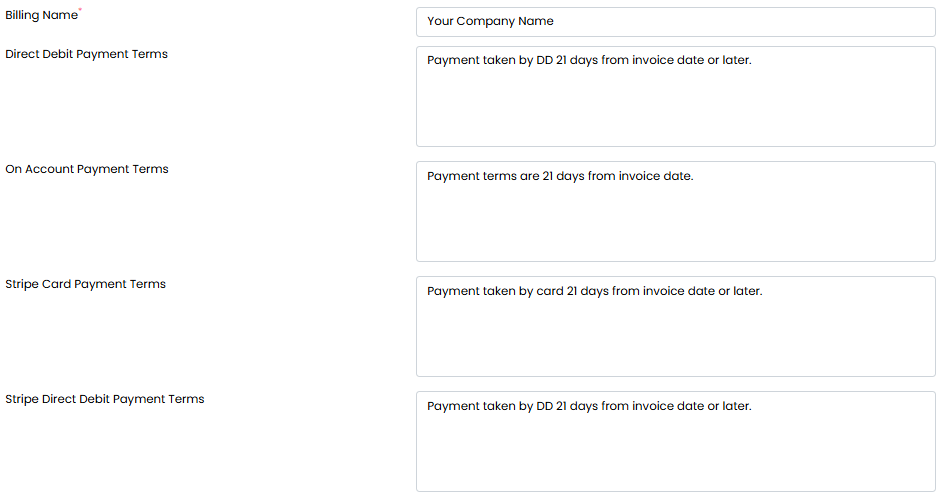
Next, add your company name in the Billing Name field.
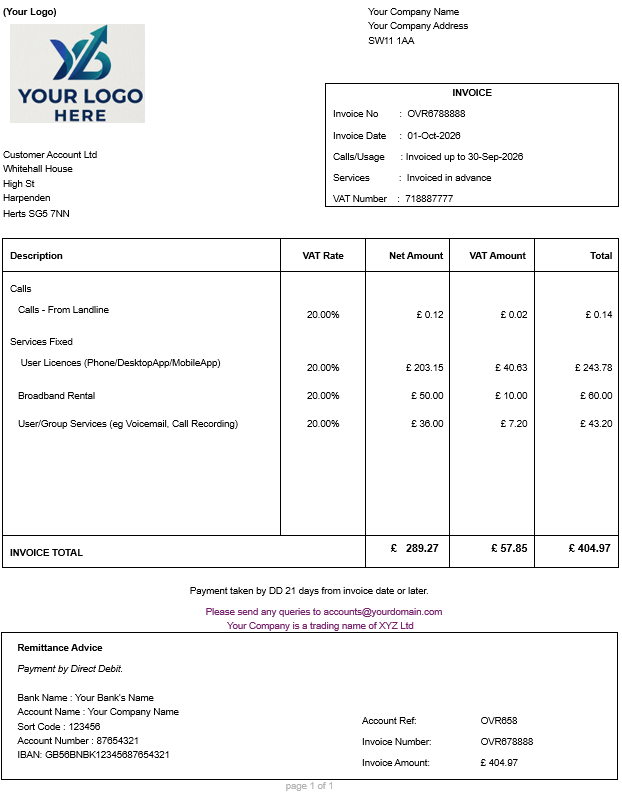
Only one Payment Terms option will appear on your customer’s invoice depending on how they pay i.e. if someone pays by DD, they will only see ‘Payment taken by DD 21 days from invoice date or later’ (or whatever wording you wish to include).
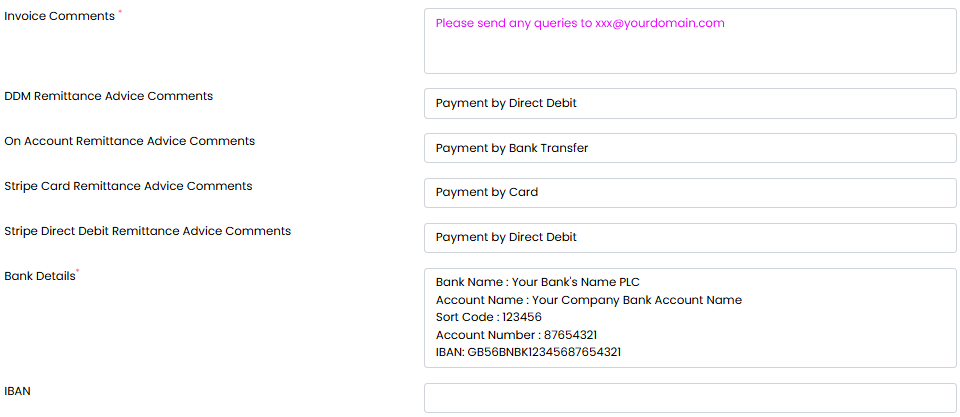
In the Invoice Comments box add any comment you wish to appear on the invoice. Then for the Remittance Advice Comments add suitable wording – again, only one option will appear depending on the customer’s payment type. Complete your bank details and enter an IBAN number if required.
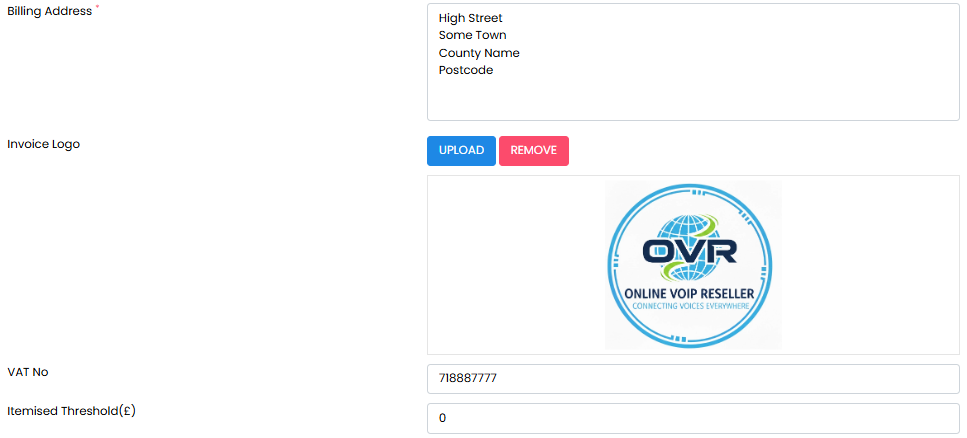
Next, enter your Billing Address and then upload your Invoice Logo which needs to be in one of the following formats – JPEG, JPG, PNG or BMP. Enter your VAT number if applicable and for the Itemised Threshold this can be used if you provide itemised billing for calls through your Report Profile i.e. if you only want to highlight calls over a specific amount, then enter the value here e.g. 3.00 (for £3.00)
The final section allows you to choose whether you attach any information files – maybe special offers or more payment information – the document(s) needs to be in PDF format; you can set this as your default profile if required and decide whether you want to include zero-rated services. (When you add a new business, it will automatically assign the ‘default’ invoice profile unless you choose otherwise).
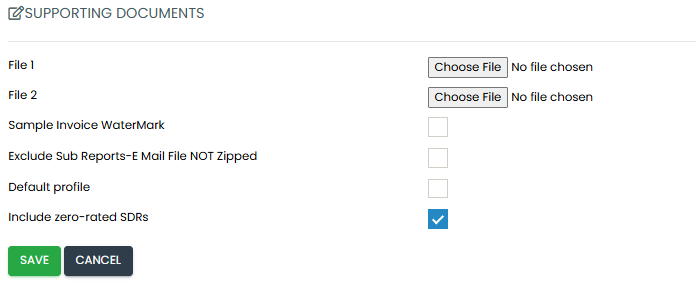
Press SAVE and your manual invoice profile is complete.
Automatic Invoice Profile
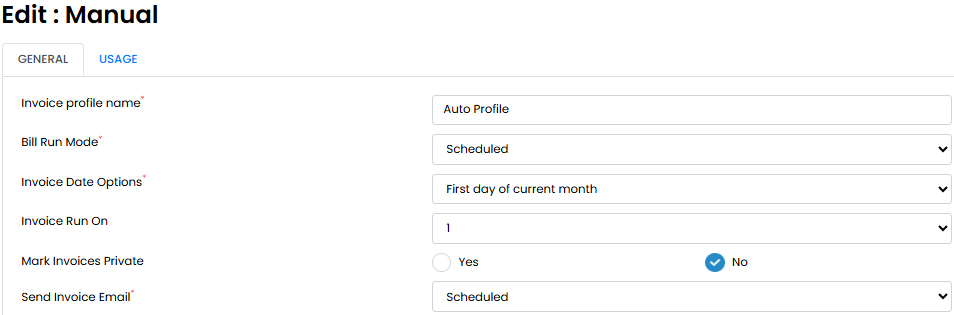
An Automatic Profile generates your invoices automatically on a chosen day each month and can email them automatically too. To set one up, only the top section needs to be changed—all other details remain identical to a manual profile as detailed above.
To save time, open your existing manual profile, update the top fields as shown on the screenshot below, and then click SAVE AS at the bottom of the page. This creates a new profile without requiring you to re-type everything.
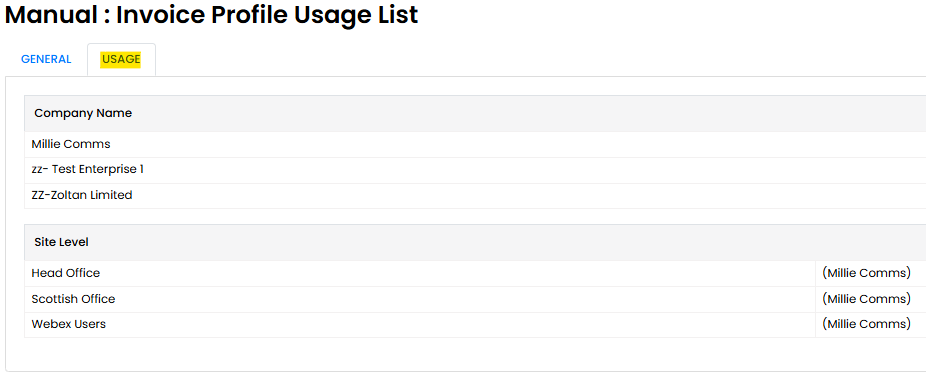
You can easily check who is using a specific Invoice Profile by clicking on the Usage tab:-
Example invoice
Report Profiles
Go to Billing in the left hand menu and search for and select Report Profiles.
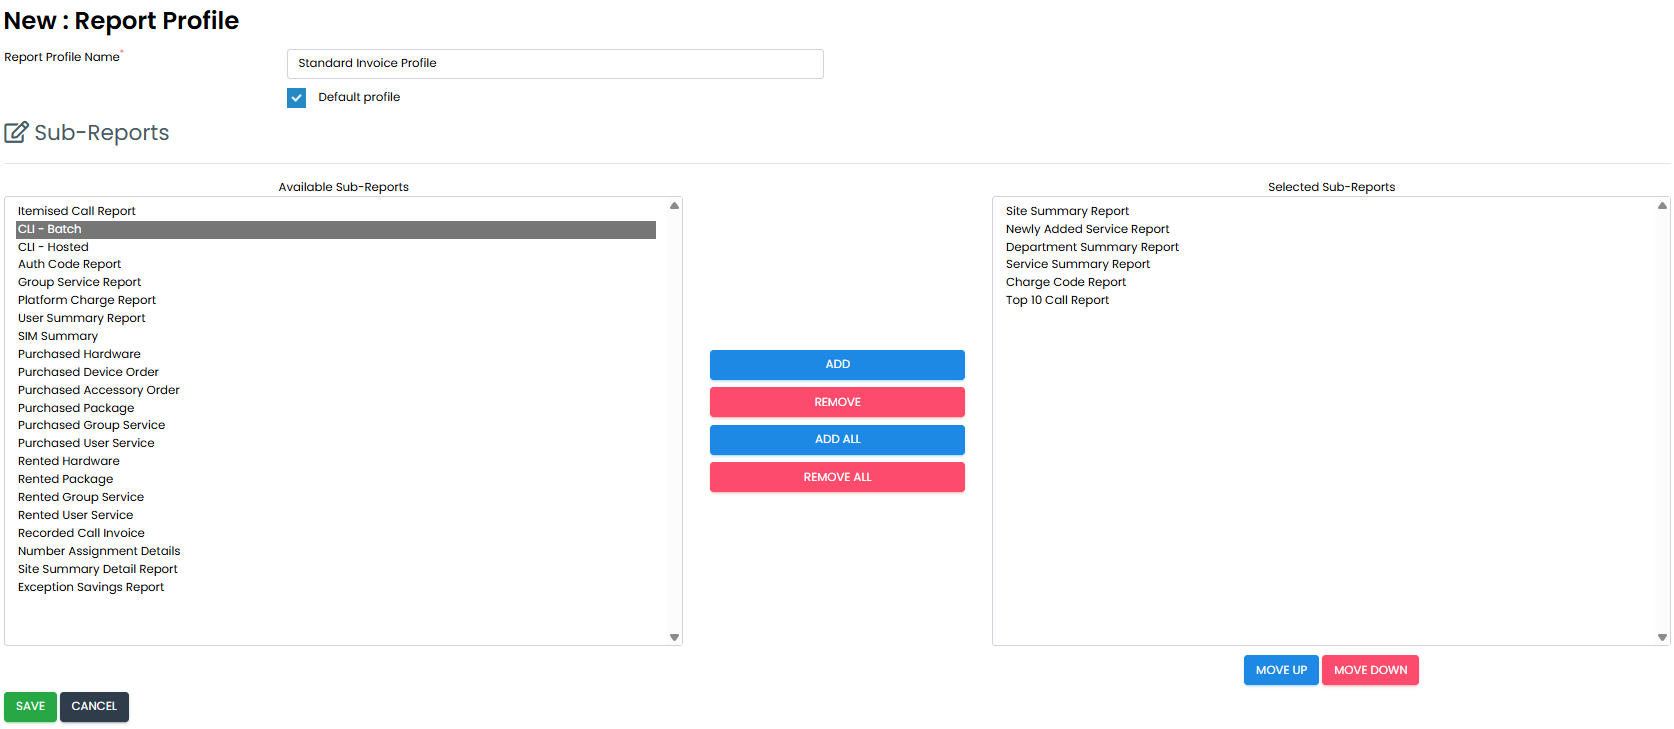
Again, you can have one or many Report Profiles. These determine what detailed reports you send to your customers along with their monthly invoice.
Give the profile a name and decide whether it will be your default profile. Then select the sub-reports from the left panel and press Add so that they appear in the right panel. You can then move the reports up and down using the Move buttons to arrange them in your preferred order. Press Save and the Report Profile is ready to use.
Setting Invoice Numbers
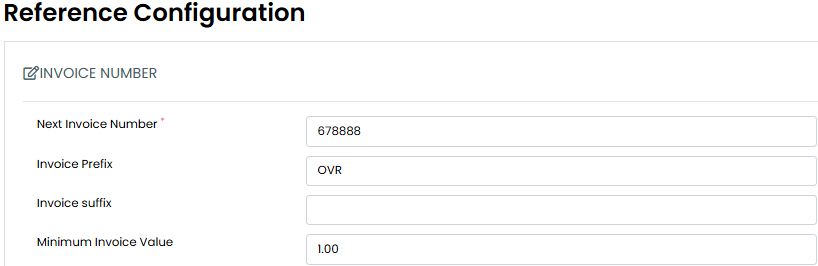
Go to Billing in the left hand menu and search for Reference Configuration. Here you can add your next invoice number and any prefix or suffix needed. You can also set the Minimum Invoice Value.