Adding a Hunt Group
A Hunt Group can be assigned at either Business or Site level. If set at Business level then anyone in the business can be a member irrespective of location. For site level only, select ‘Sites’ from the main left hand menu and then choose the site you are adding the Hunt Group to. Once you're in the required level, from the left hand menu select ‘Services’.
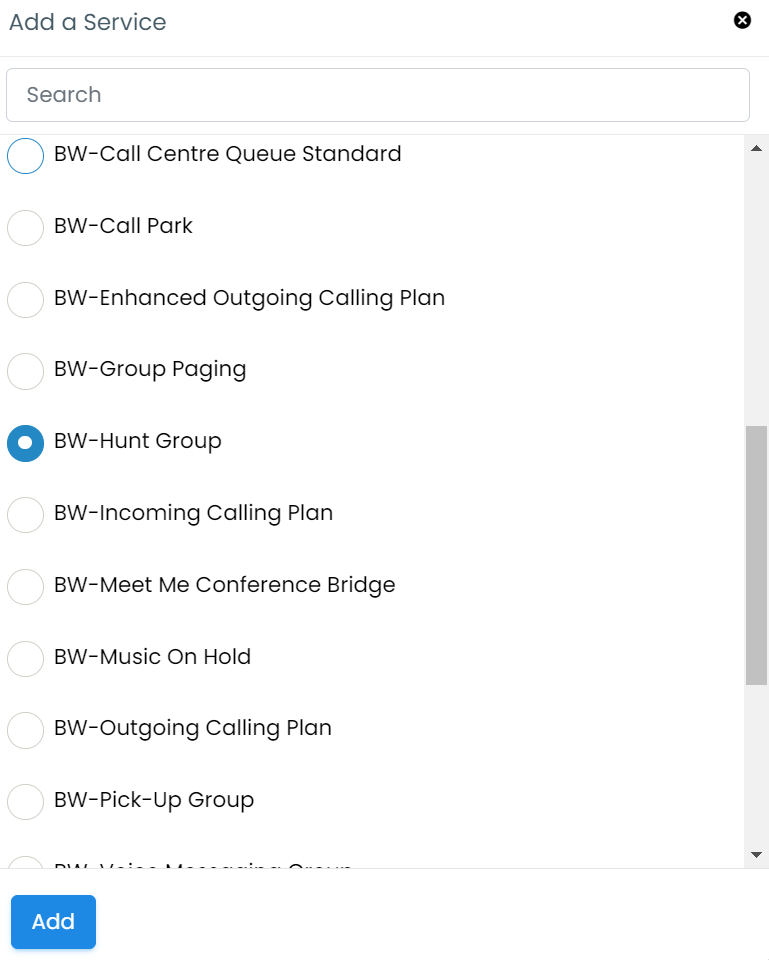
Once you're in the Service section, press 'Add' on the right hand side. Then select BW-Hunt Group from the services list pop up box and press 'Add':-
Complete the Instance ID, Instance Name and Description. The Calling Line ID First Name and Calling ID Last Name will indicate which Hunt Group the call is coming in on. If required, input a password and confirm (this may be used by administrators to access the Hunt Group set up). Select the VoIP Telephone number and/or extension number for the Hunt Group.

Select the ’Call Policy’ from the drop down box – Regular, Circular, Simultaneous or Uniform and this will dictate how the calls are delivered (a full description of each type is given in blue). Insert Charge Site and Charge Department if required. Next select the language and time zone (these should auto fill) . The ’No Answer Settings’ can be set to forward calls to another internal or external number, a mobile or voicemail (this could be set up as a service on the Hunt Group or you could send the call to a user's voicemail - just enter *55xxxx where xxxx is the extension number of the voicemail box you want to send the call to). If no forwarding instructions are input the calls will continue to ring out on the Hunt Group number. Remember that call charges will be incurred for any calls that are forwarded to an external number or mobile. Also remember that if e.g. you have three people in a hunt group and all three are busy on other calls, the next caller will hear an engaged tone; if you want something to happen to that next call you will need to add the 'Call Forward Busy' service onto the Hunt Group - just select CFB on the Service Assignments tab and then direct any calls using the Service Configuration tab.
The ’Not Reachable Settings’ allow calls to be forwarded to an alternative number e.g. in the event of a power loss.
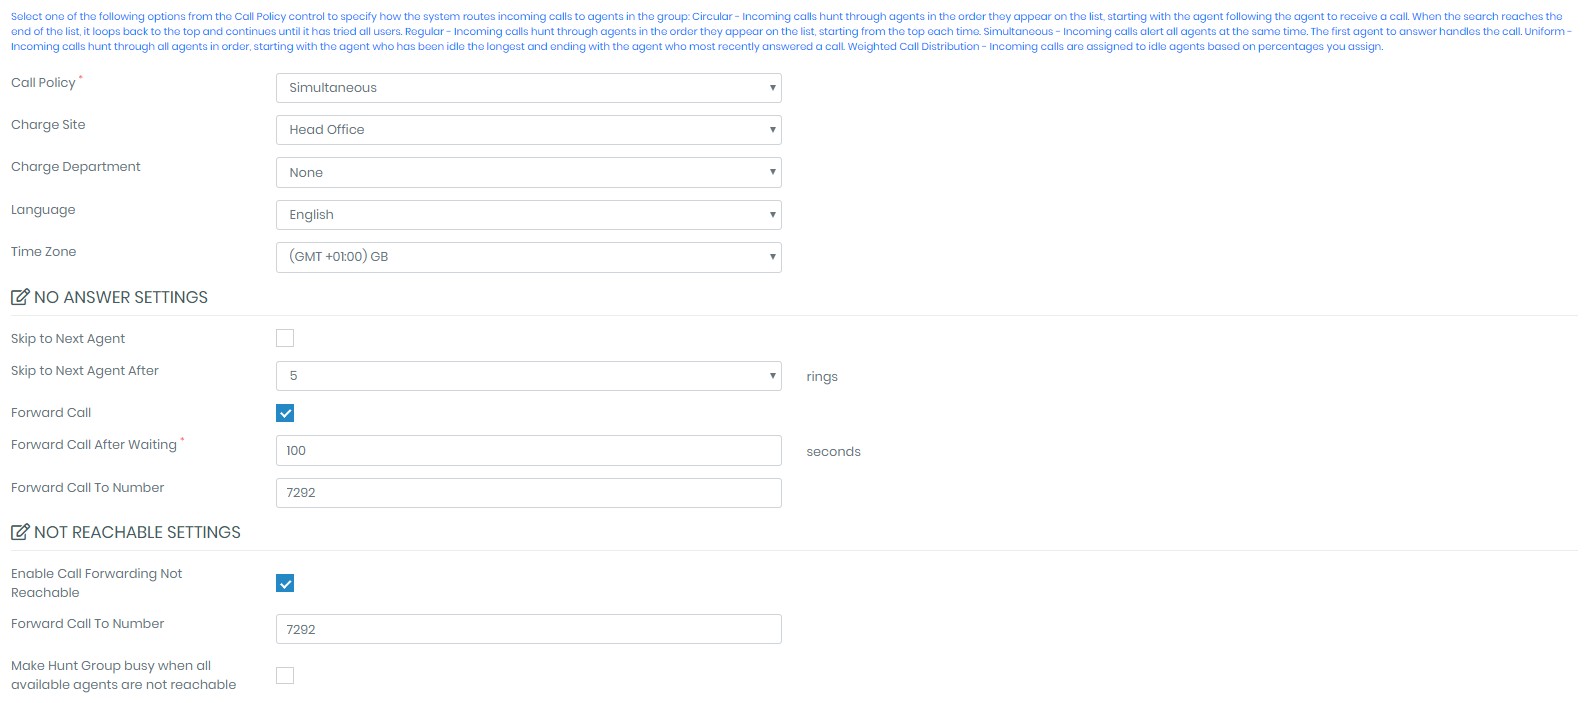
Select the appropriate CLID (Caller Line ID) and Agent Settings.

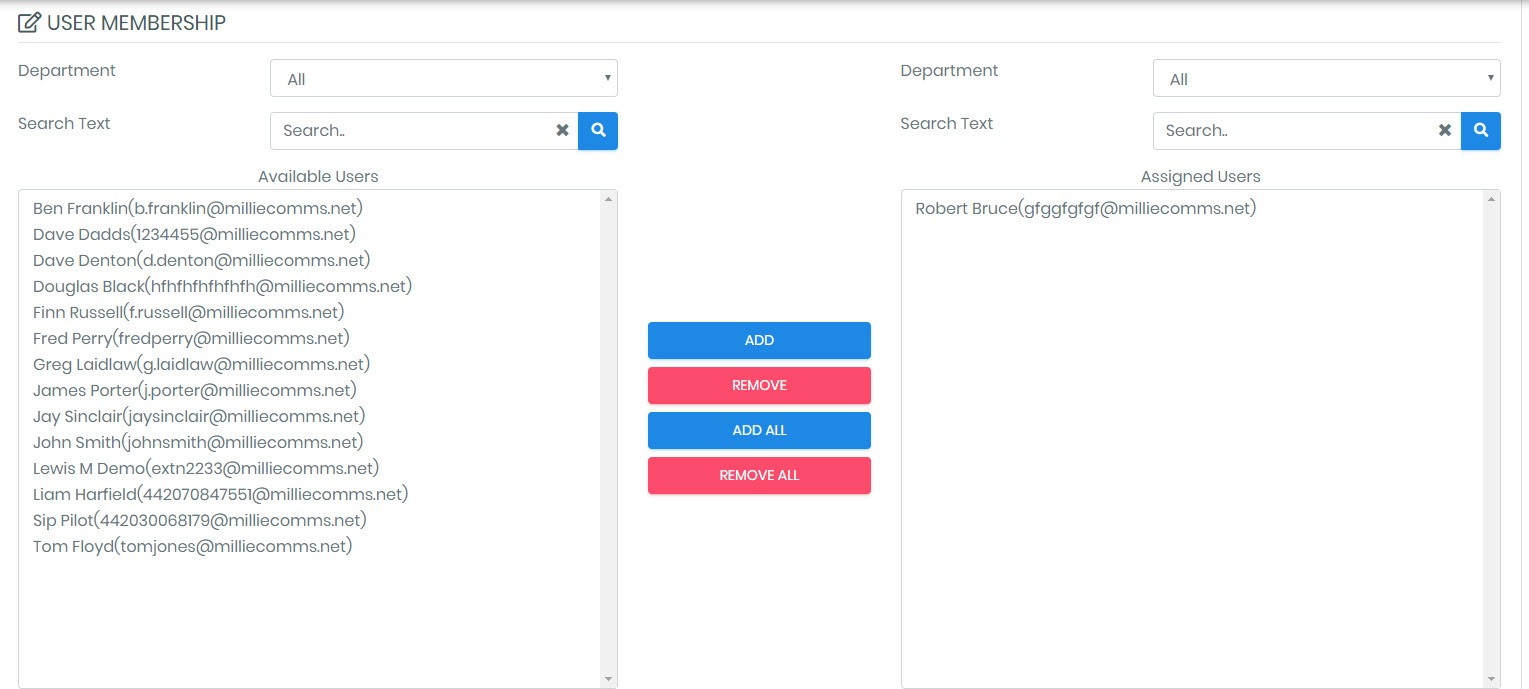
Now you are ready to add users to the Hunt Group. Select each user by using by highlighting their name in the left hand box and then press ’Add’. Or just press ’Add All’ if required.
Scroll down to the end of the page and press SAVE. Your Hunt Group is now active.
Amending a Hunt Group
If you wish to add/remove any users in future select ’Services’ and select the existing Hunt Group instance you wish to amend. In the User Membership section just select the user(s) before pressing ’Add’ or ‘Remove’.
Remember to press SAVE!