Adding a New User
A new user can be added to Uboss at either business or site level.
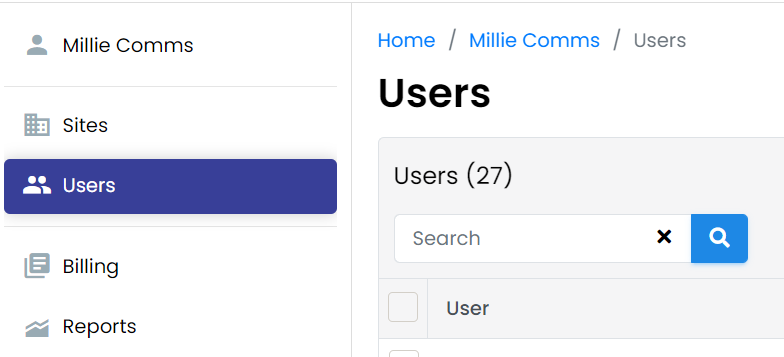
To add a new user, at Business level, from the left hand menu select 'Users'
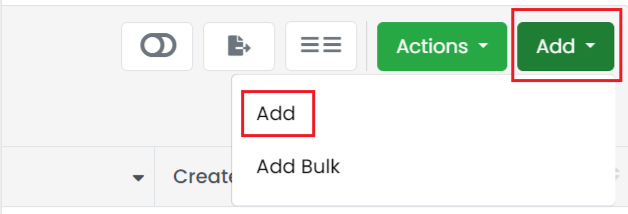
On the right hand side select 'Add' and then 'Add' again:-
Once you have selected the add option you will be taken through the 'Add User Wizard'. All mandatory fields are marked as such with a red asterisk. If you hover over any of the titles, it will give a brief explanation of that field.
Profile
In the top section, select the Site Name, Type (normally Hosted) and enter the user's first and last name. (Please see the separate guide on Uboss User Types https://docs.uboss.com/v2/docs/uboss-user-types)
If you use Departments, select the required one from the drop down box. If Webex is going to be assigned to the new user, you will need to fill in the Email Address, otherwise leave this blank.
Next enter a Password for the new user and confirm. The password must contain a minimum of 8 characters with at least one lower case letter, one upper case, one number and one special character. This password is used to access Uboss as well as apps e.g. Webex, Unity etc. Next you can enter the Mobile Number and Job Title although these fields are not mandatory. Uboss will automatically enter the time zone for the UK but amend if required.
Primary Package, Secondary Packages and Additional Services
In the first section select the required licence type for the user.
Then select any Secondary Packages required and any Additional Services.
VoIP
In the 'VoIP' Section if you leave the 'User ID' blank, Uboss will generate this for you; alternatively you can choose your own unique User ID e.g. the new user's email address. Select the DDI from the drop down box or leave this as Extension Only. Enter an extension number of your choice (avoiding any network or special service numbers e.g. 112, 999, 123 etc.) and then select the Outbound Call Identity - if blank it will present either the DDI of the user or the main business phone number. Select the Primary Device and add/select the MAC address.
Now press
 - you will get an error message if you have not completed all required areas.
On the next page it will give a summary of the new user. If all correct press 'Return to User List' or press 'Add Another User' if required.
If you have a large quantity of new users to add, we have a bulk tool available. Please contact the team to discuss.