Moving Users from Hosted to SIP (Microsoft Teams Calling)
There may be some downtime when moving users from Hosted to SIP so you may wish to action out of hours.
User Profile Changes
-
From each user’s profile page, you will need to change the ‘User Type’ from Hosted to SIP and then press Save.
-
Go back into the user profile and then select the ‘Packages/Services’ tab and select the new Teams package from the drop down box and then press Save.
-
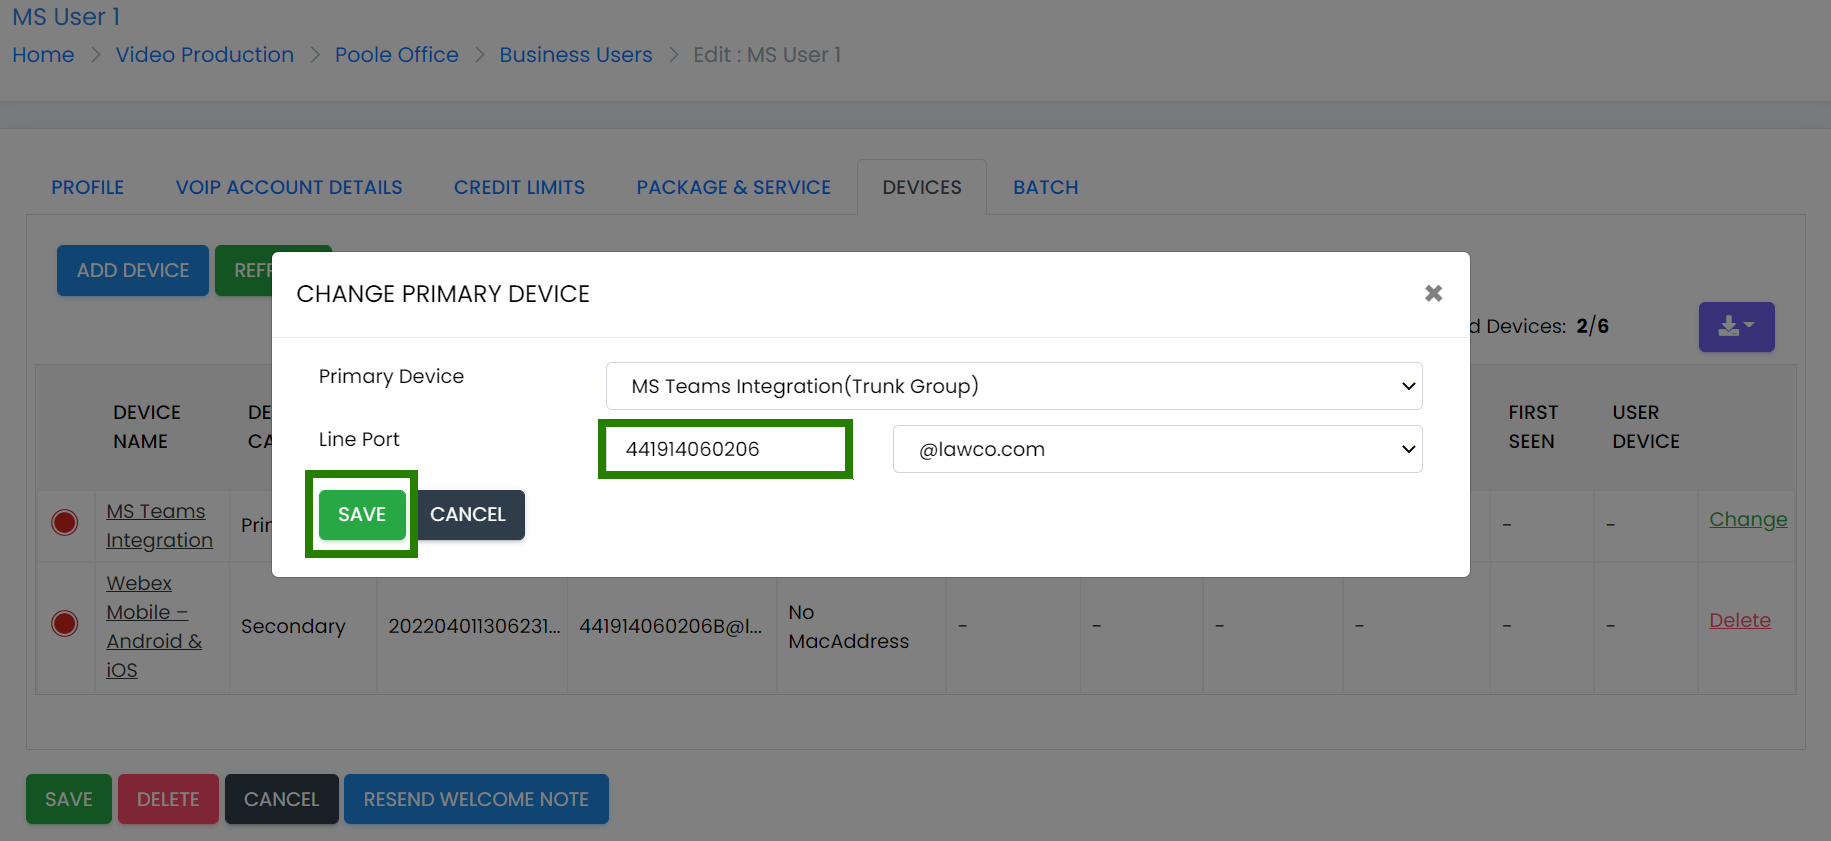
You will need to go into the Devices tab on the user profile and add/change the primary device to the Teams SIP trunk device i.e. MS Teams Integration. Press Save.
-
Finally, go to the devices Tab, and set the Primary Device to the MS Teams Integration Service that you added earlier.
Make sure the user has a DDI and then Save the user. Remember it should be the DDI of the user with the country code in place of any leading zeros, and it must not have any alpha characters. Please see the example below.
Business Assignment Changes
-
Go the Business Service Assignments and select the MS Teams Calling Integration service.
-
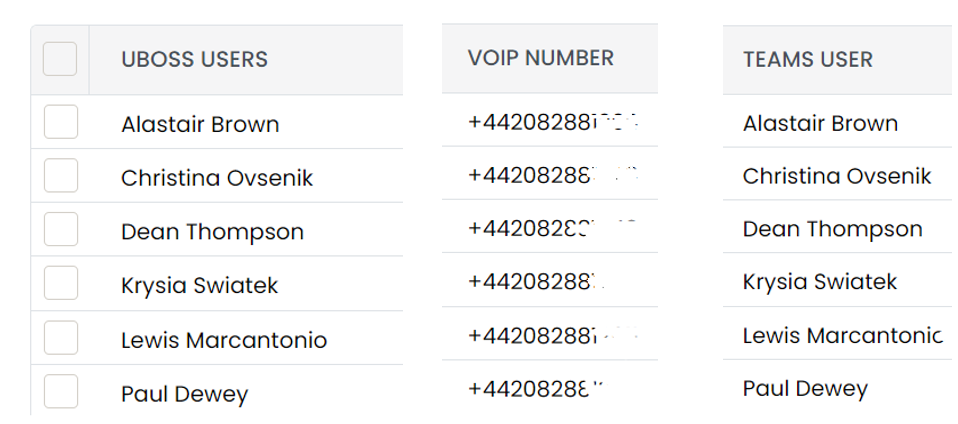
Select the ‘Users’ tab and then on the next screen select the ‘Unmapped Users’ tab.
-
For each Uboss User shown on the left hand side, use the ‘Teams User’ drop down box to select that user’s name on the right hand side. Complete this for all Unmapped users and then press Save.
- Next go to the ‘Sync Jobs’ tab and press the ‘Send Sync Now Email’.
Call 2 Teams Changes
Once the above steps have been completed, the MS admin user will now need to go to the C2T portal and press ‘Sync Now’. This process may take some time so to minimise downtime it may be best to move users in small groups.
Once the users have been moved successfully, you can go back into the user’s profile and add any additional services they may need e.g. Call Recording, Call Centre Agent, etc.