This guide will walk you through the step by step process to manually configure a Gigaset N510.
Step 1: Obtain the user credentials
Login to the Uboss portal, naviagate to the user that will need configuring under Client>Business Users.

Click on the user.
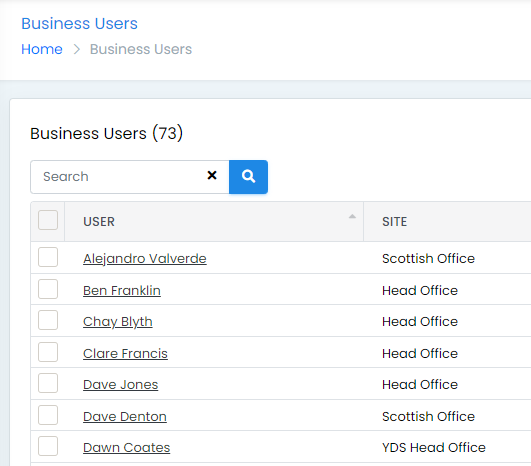
**Click on the Devices tab and then click on the Gigaset N510 device **

Make a note of the first part of the Line Port (the @domain is not needed), the SIP Username and the SIP Password

Once you have these credentials proceed to Step 2.
Step 2: Logging on to the Gigaset N510
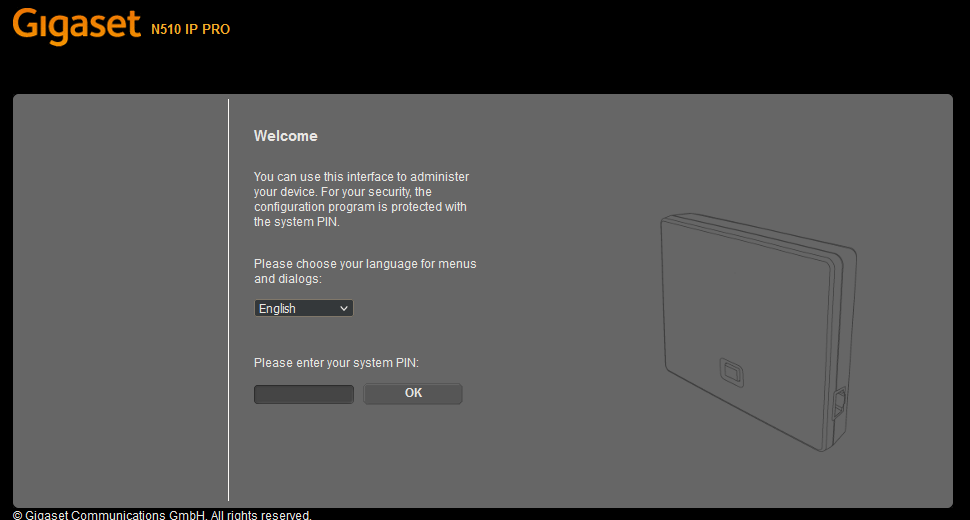
Now you have to login to the Base Station to configure the device. If you have handset registered to the base station, click on the blue button on the front of the base station, this will send the IP Address to the display of each handset. Make a note of this IP Address and then on a computer open your web browser and type the IP Address in. E.g. https://192.168.1.10. This will send you to the Web GUI of the base station and you will be prompted for the System PIN, this should be 0000
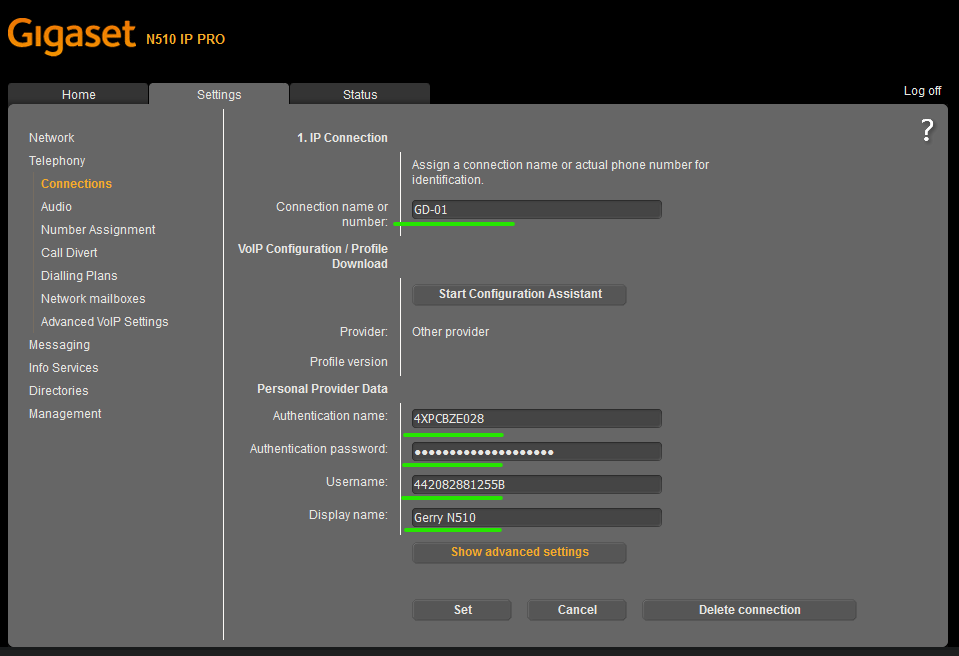
Step 3: Configuring the Gigaset N510
Click on Settings
Click on Telephony>Connections and then edit IP1

**Complete the following:
Connection Name: Can be anything relevant
Authentication Name: This is the SIP Username from Uboss
Authentication Password: This is the SIP Password from Uboss
Username: This is the line port from Uboss
Display Name: This can be anything relevant
Finally click on Show Advanced Settings
 {height="" width=""}
**Complete the following:
Domain: sbc.insmartcloud.com
Proxy Server Address: sbc.insmartcloud.com
Proxy Server Port: 5060
Registration Server: sbc.insmartcloud.com
Registration Server Port: 5060
Outbound Proxy Mode: Automatic
Outbound Proxy Server Address: sbc.insmartcloud.com
Then click on Set
 {height="" width=""}
When you are back on the connections page, make sure the connection is marked as active.
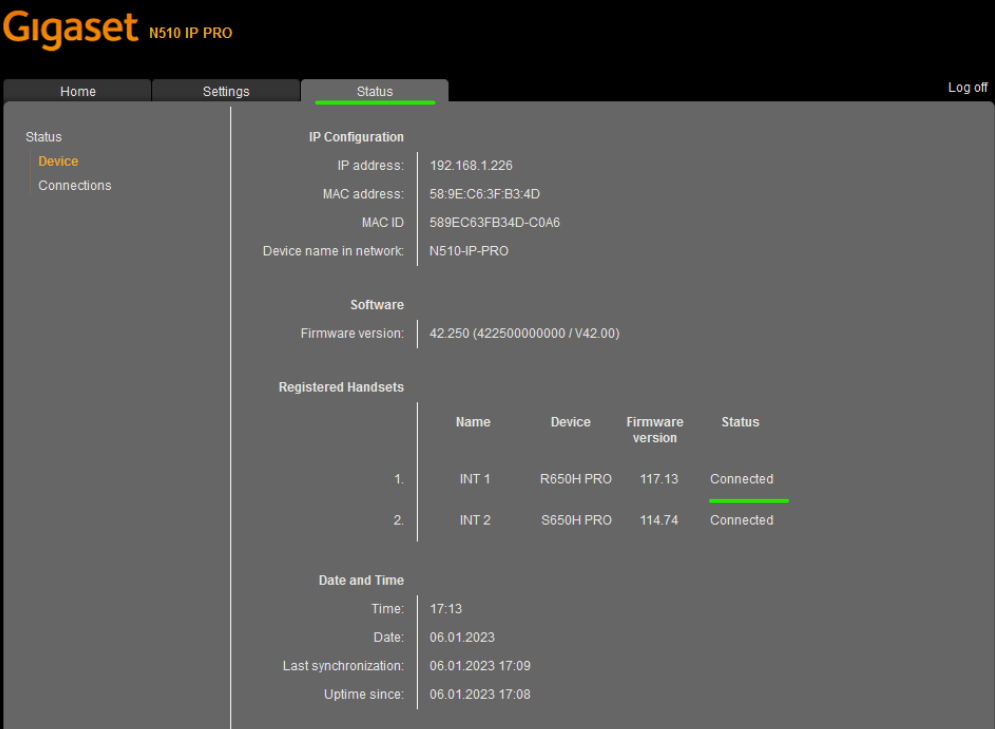
To check the registration is successful you can check the Status Tab