Uboss - KMPIQ – KEEP MY PLACE IN QUEUE SERVICE
Keep My Place in Queue (KMPIQ) is an add-on feature for Unity Agent, Supervisor and Reception that allows queued ACD calls to be held in place in the call centre queue when the remote party has released the call, then for the agent to call the party back when their held call becomes the next in line to be answered.
- Firstly, you need to create a new queue. At business level, go to Services in the left hand menu then press Add on the right hand side. It will need to be either a Standard or Premium Queue. Complete all sections with a red asterisk:-
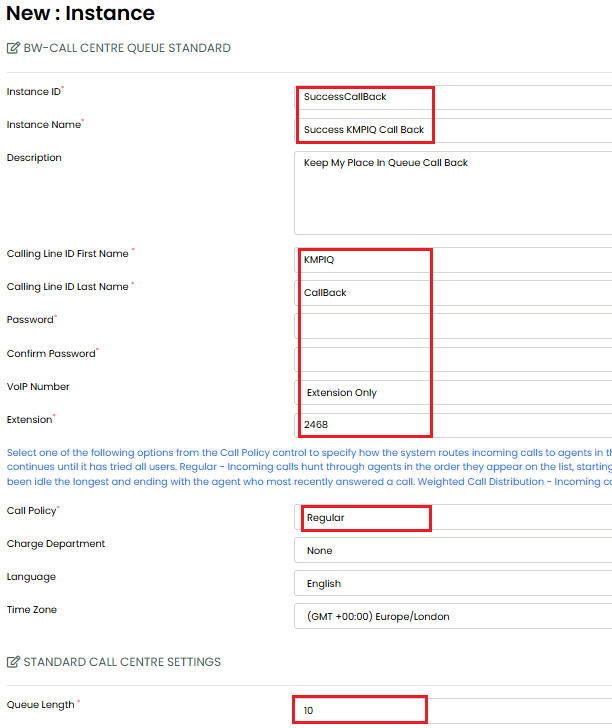
Now press Save.
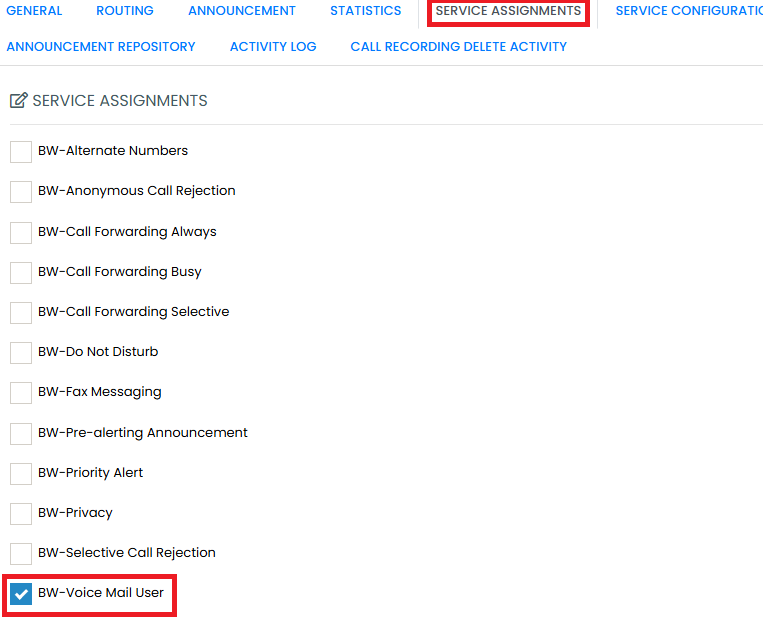
- Select the new queue you have just assigned and select Service Assignments from the blue tabs. Tick the BW-Voice Messaging User box and then press Save.
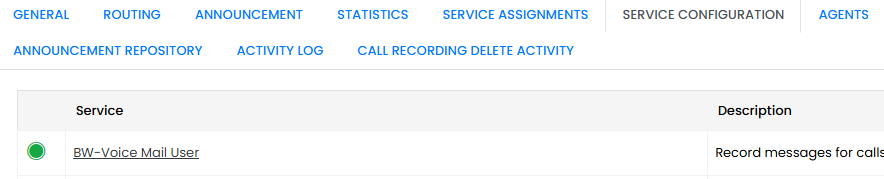
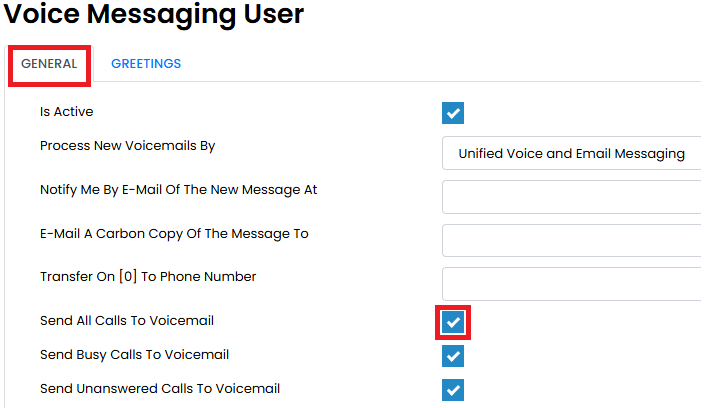
- Next go to the Service Configuration tab and click on the BW-Voice Messaging User which now has a green button showing that it is live.
On the General tab make sure you tick the 'Send all Calls to Voicemail'.
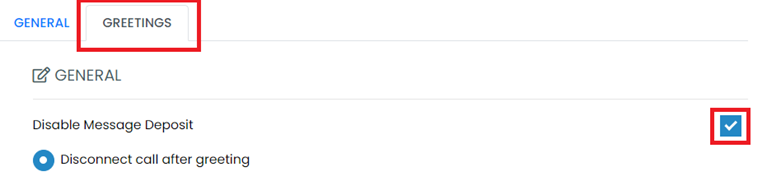
Then click on the Greetings tab and tick the ‘Disable Message Deposit’ box and press Save.
Upload a greeting for this voicemail which says e.g. “If you are presenting your number, we will call you back”. (To upload a greeting, at Business level, go to Settings->Announcement Repository and press Add. Give the greeting a name, upload the recording and tick the agreement box – then press Save).
- Next, at Business level, go to Services in the left hand menu and select the Call Centre Queue that you want to add the KMPIQ service to.
Assign an escape digit to that queue e.g. 1 and include in your comfort message e.g. “If would you prefer us to call you back, please press 1”. Remember to press Save.

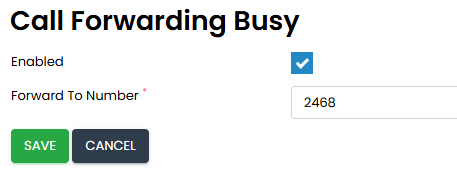
- You will also need to assign Call Forward Busy and configure this to go to the extension of the new queue that you have just built. Go to the Service Assignments tab in the queue, tick the Call Forward Busy box and press Save. Next select the Service Configuration tab, select the Call Forward Busy service, tick the 'Enabled' box and enter the extension number of the new KMPIQ queue. Press Save.
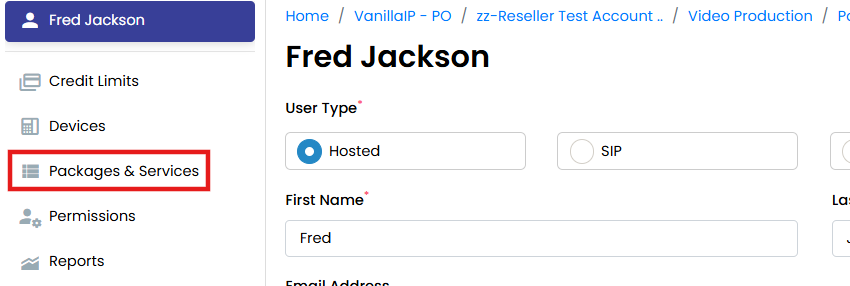
- Next, assign Keep My Place in Queue to the Agent. Go to Users in the left hand menu and select your Agent. On the Agent’s profile page select the Package and Service tab:-
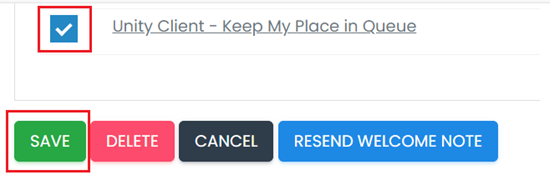
On the next page, find ‘Unity Client – Keep My Place in Queue’, tick the left-hand box and then press Save at the bottom of the screen.
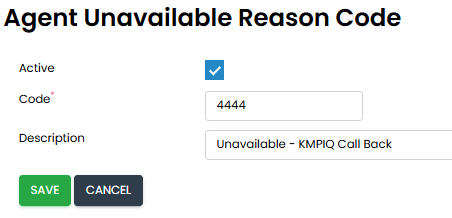
- You will also need to assign an unavailable code at business level called Unavailable-KMPIQ Callback. At Business level, go to Settings in the left hand menu and then search for 'Agent Unavailable Reason Code'.

Press Add on the next page. Make sure the 'Active' box is ticked, select a number for the code (this can be any number you wish) and then give it a description.
- Now open the Unity App on the Agent’s desktop and go to ACD state and amend the unavailable code to the one you’ve created:-
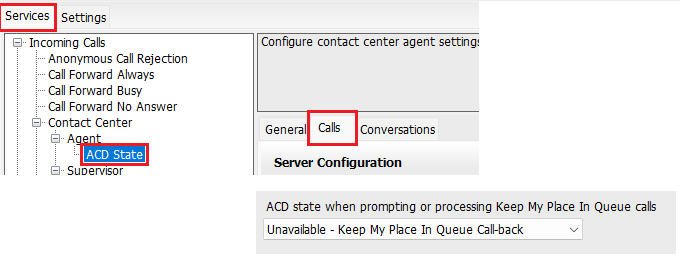
Please Note - this needs to be actioned in the App, not on the Web version.
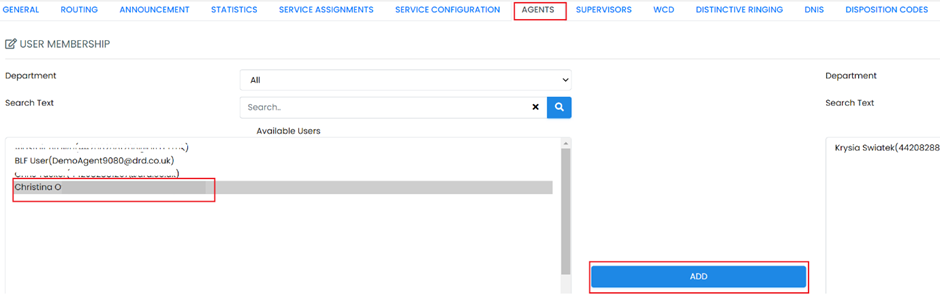
- Now add the Agents to the new queue you've just created. Select 'Services' from the left hand menu and select the relevant queue; from the blue tabs select Agents and then add the required users from the left hand side to the right by clicking on the Add button. Then press Save.
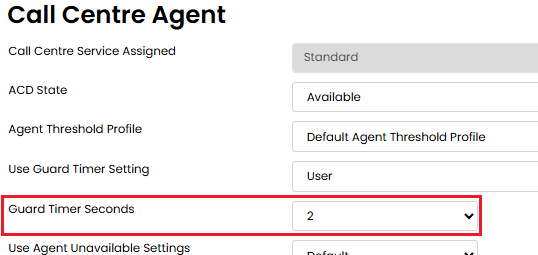
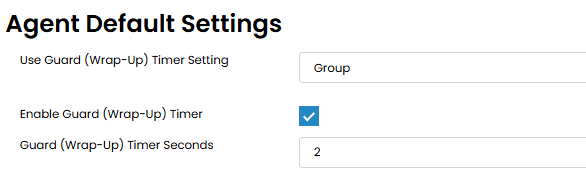
- Finally, we need to check the 'Guard Settings' at both Business and User level.
At Business level select 'Settings' from the left hand menu and then search for and select 'Agent Default Settings'. Check that the 'Enable Guard (Wrap-Up) Timer' box is ticked and the Timer Seconds is set to '2'.
At User level, select 'Service Configuration' from the left hand menu and then select 'BW-Call Centre Agent Standard' (or Premium if applicable) on the right-hand side.
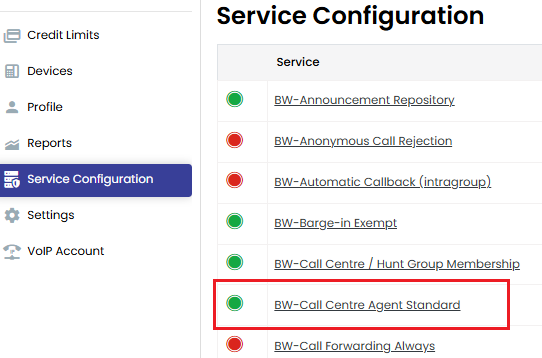
On the next screen please make sure the Guard Timer Seconds dropdown box is set to 2.