Introduction
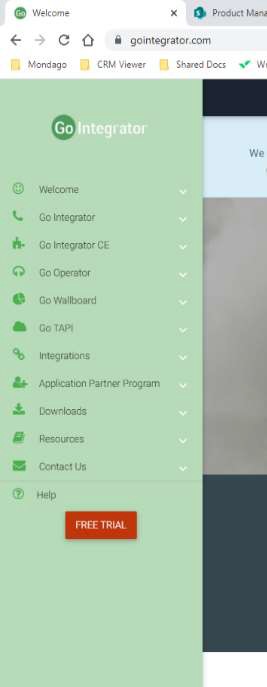
Welcome, this quick reference guide contains useful information to help you get started with Go Integrator Cara. You can find the download links here
Access codes and Login Screen
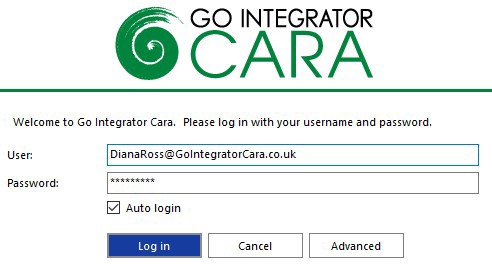
When you first install Go Integrator Cara (Cara) you will be promoted to enter an “Access Code”. The Access Code is - 'gosmart'. The Access Code only needs to be entered once.
Cara will prompt you to login each time the client is started. If you prefer you can set auto-login to bypass this step.
Interfaces
Cara has four user interfaces: System Tray Menu, AppBar, Toolbar, and Preview Window. The System Tray and AppBar menus provide similar functions and you will need to decide one or the other according to your preference; the System Tray is the default interface. The Toolbar and Preview Window operate the same way with both.

System Tray Menu
Cara runs in the System Tray.
The System Tray Menu is accessed by right-clicking on the Cara client circle icon, which is normally green in color. The color will change according to your hook state or Microsoft Teams Availability.
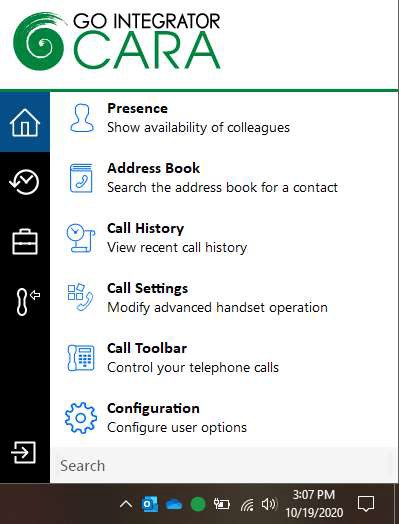
AppBar
The AppBar is a windows App bar that docks to the left- or right-hand side of your monitor. It is interactive and expands according to user selection. The expanded section can be locked open and the other applications open on the desktop will then dock to the expanded section.
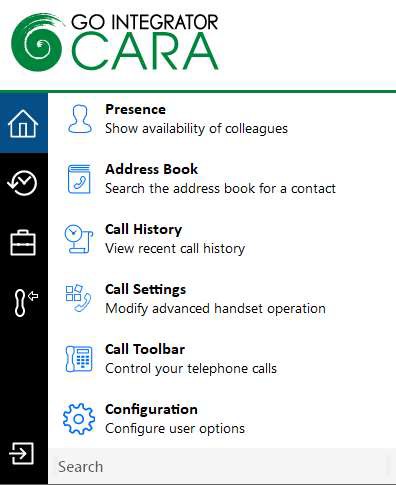
The AppBar presents the following options: Presence, Address book, Call History, Call Settings, Toolbar, Preferred Device, Help, Configuration, and Exit.
Toolbar
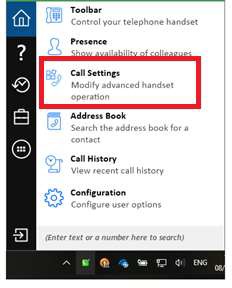
The Toolbar can be accessed either from the “Toolbar” option on the System Tray Menu or the AppBar.

The Toolbar is another dockable user interface for Cara. It allows many of the core features to be accessed plus it provides a range of Call Center Agent features. The Toolbar can be used in a docked or undocked presentation and can be simultaneously docked with the Presence window.
Preview Window
The Preview Window is displayed whenever an inbound or outbound call is ringing.
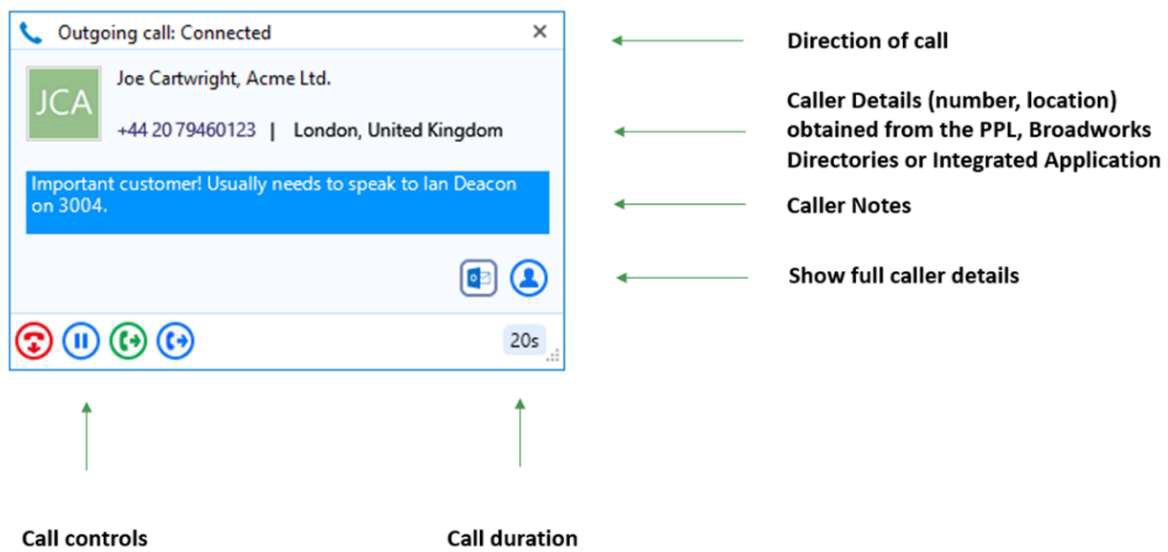
The Preview Window automatically disappears shortly after the call has connected and can be re-displayed at any time during the call by hovering over the System Tray Menu icon (the display time of the Preview Window can be set in the configurations). It has been specifically designed to be as unobtrusive as possible, without taking up a large proportion of your screen or obscuring the screens of other running applications.
It displays the caller (or called party) details, which are obtained from the Integrated Business (CRM) Application/s.
Call Controls
The following call controls are available through the Preview Window
Answer | When a call is ringing, you can choose to answer the call by clicking the "Answer" button or deflecting it (transfer it without answering it) to another extension | |
| Hang Up | End the call |
Hold | Pause the call, the caller will hear hold music if available | |
Consult | Place the current call on hold pending a transfer and makes a concurrent call to the selected extension | |
Transfer | Transfers the call immediately to the selected extension (remember to say goodbye first!) | |
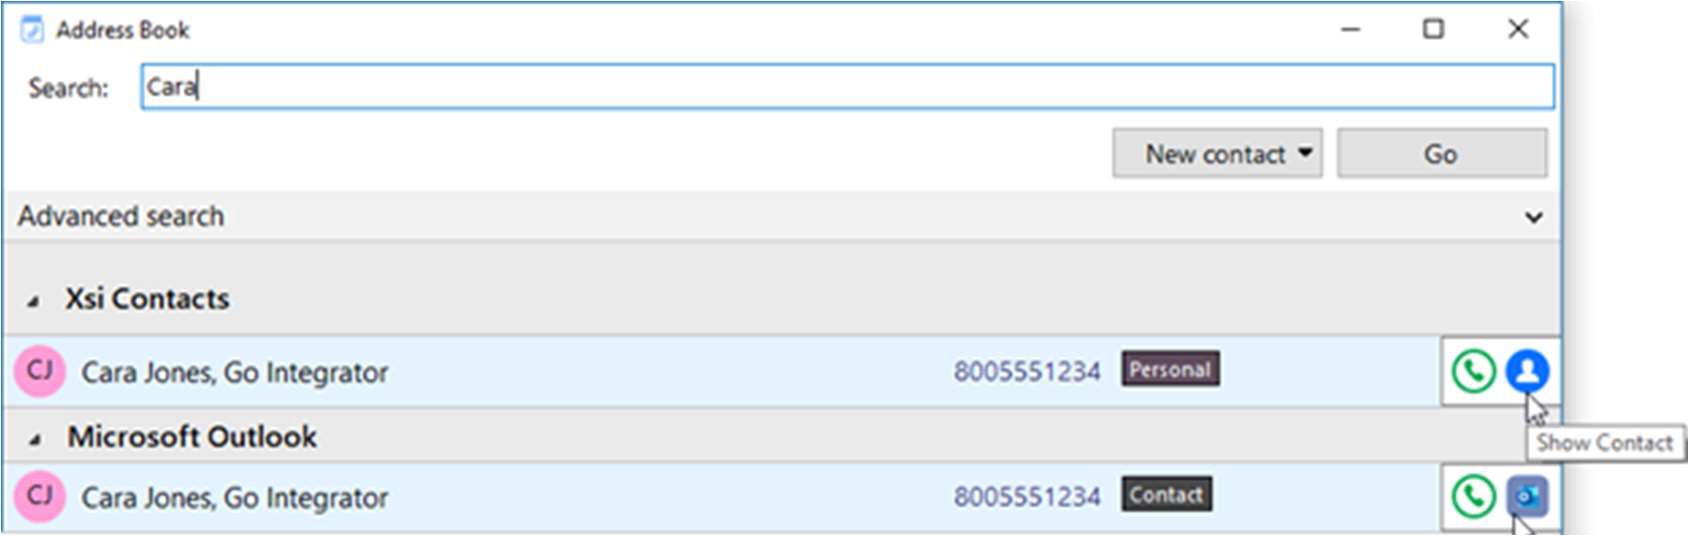
Show Contact | Shows the caller’s full contact details, as obtained from the Integrated Business (CRM) Application/s | |
| Add Contact | Add the caller to the Integrated Business (CRM) Application/s, while on the call fill-in their details |
Pop Contact | Shows the caller’s full contact details from the Integrated Business (CRM) Application/s. The icon shown will be related to the application (example shown for blue Outlook icon) | |
Create and Show Call Task | Creates and opens a call activity (call log) in the Integrated Business (CRM) application/s. Same icon shown will be related to the application (example shown for Salesforce Task icon) |

.png)


*The Call Control functionality is dependent on the preferred device selection. The call controls displayed in the Preview Window will be driven by the Preferred device selected.
Answer | Hold | Consult xfer | Blind xfer | Hang up | |
Deskphone | ü | ü | ü | ü | ü |
UC-One | ü | ü | û | û | ü |
Cara Softphone | ü | ü | ü | ü | ü |
Teams | û | û | û | û | û |
Preview Window (Stacking)
If there is more than one active call, the Preview Windows for those calls are automatically stacked to reduce the overall size of the display.
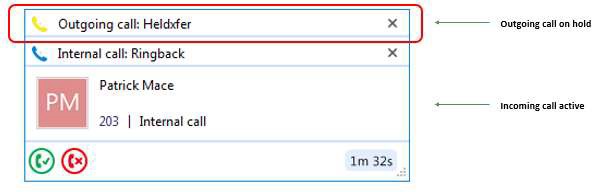
Clicking on the header of any window will bring it to the front.
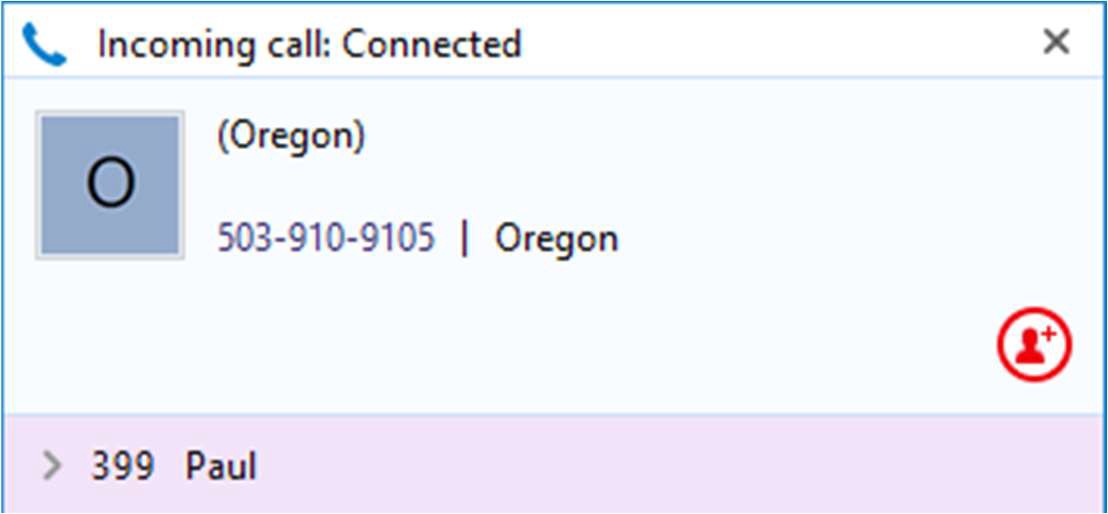
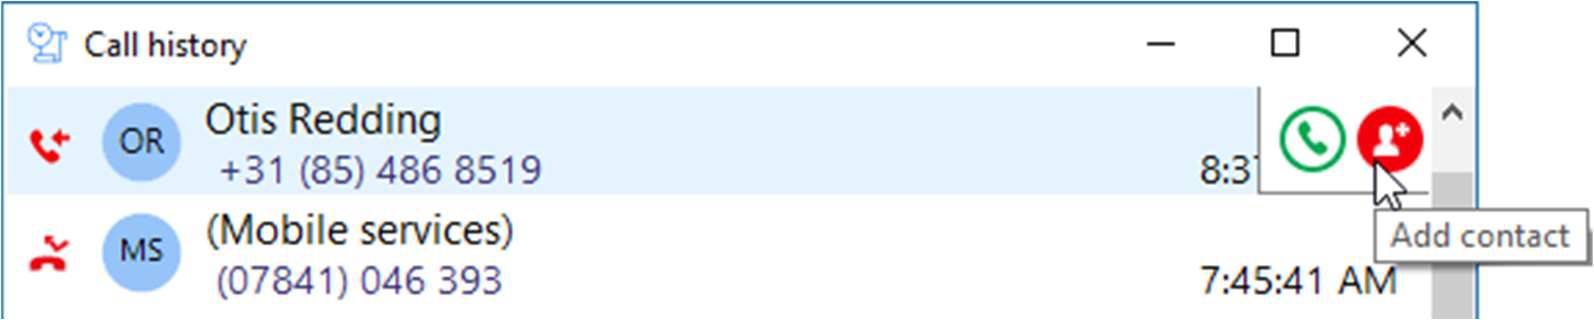
Add Contact
You can add contacts while on a call or from call history. The red circle with ‘+’ indicates the caller is not in the Address Book or any Integrated Business (CRM) Application/s. By clicking the red icon, the contact can be stored and saved in the directory of the integrated Business (CRM) Application/s. Once added the contact can be easily copied to other integrated applications.
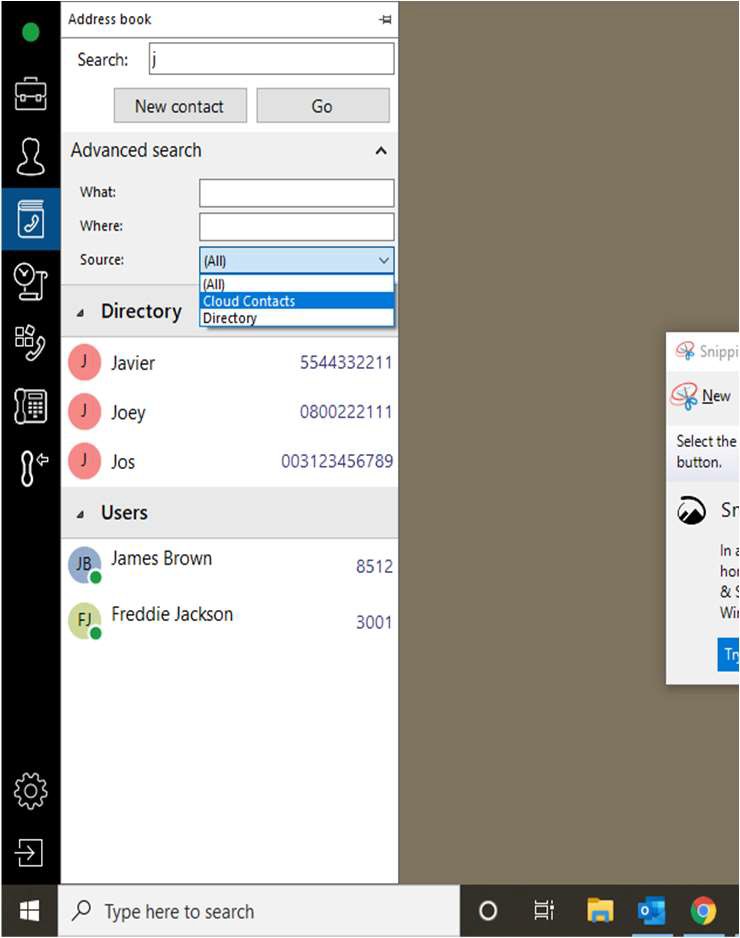
Address Book Searching
Cara can search Outlook, Google Contacts and PBX directories, along with any Integrated Business (CRM) Application/s. Please note, the applications you can integrate with is dependent on the Cara license.
In this example, the user is searching for contacts with the name “Cara”, and the search has included a contact from the PBX Personal Contacts and Outlook.
Call Control within the Address Book Search
The “Consult” and “Transfer” call controls can be used against any contact in the address book.
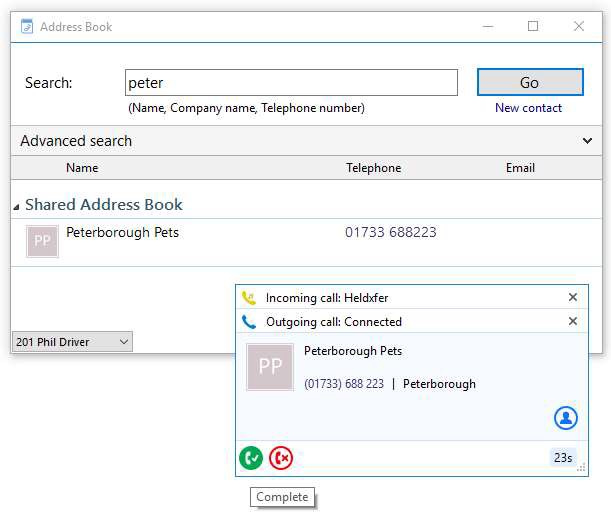
With a call already connected, click on the contact’s number in the search results to put the original call on hold and make the consult call.
*Call functionality will vary by device used - see device call control table above.
Presence
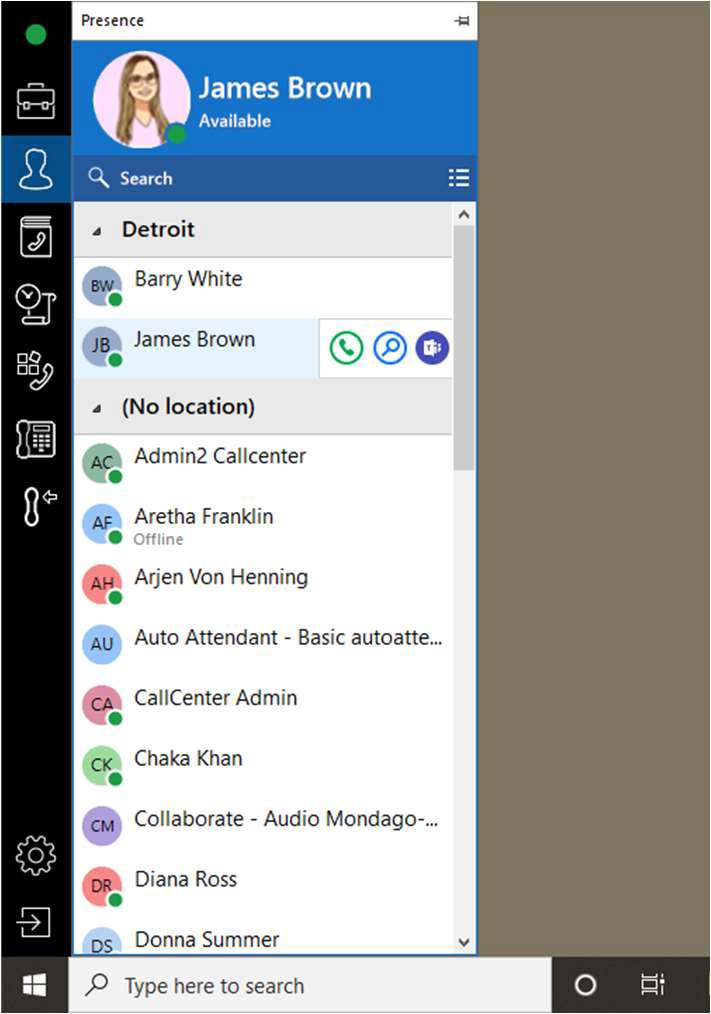
The Presence window allows you to check your co-worker’s hook state or Microsoft Teams Availability, including when they have DND set. If your Presence window is showing Microsoft Teams availability and a co-worker makes or receives a call on their extension, then the availability shown will be changed to “On a call” while the call is in progress. Once the call ends the current Microsoft Teams Availability will show.
Other key features available from Presence include:
Call co-workers, transfer call or pick up co-worker calls
Show co-worker details
Open Microsoft Teams chat
The Presence window allows favorites to be added. This is done by selecting the star symbol in the slide out menu against a co-worker in the Presence window. Note: Limited to 250 extensions by default
Extension hook state / MS Teams Availability status can also be checked from the System Tray Menu of co-workers by searching for part of their name.
Dialing Options
Cara offers a wide range of click-to-dial features to speed up the outbound calling process, both in locating the number to dial, and in the actual dialing process itself. The following features are described below: Quick Dial, Recent Calls, Call History, Clipboard Dialing, Webpage Dialing, Screen Read, and Focus Dialing.
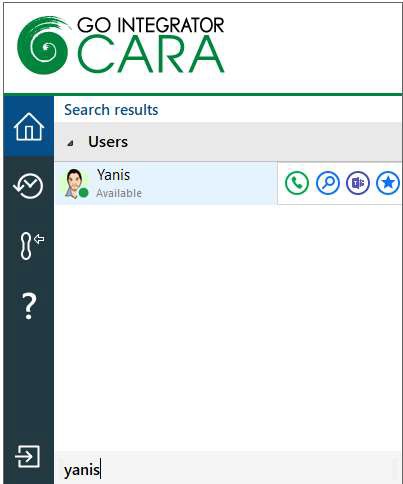
Quick Dial
In the “Quick Dial” entry box at the bottom of the System Tray Menu, you can type the phone number and hit Return to dial the number.
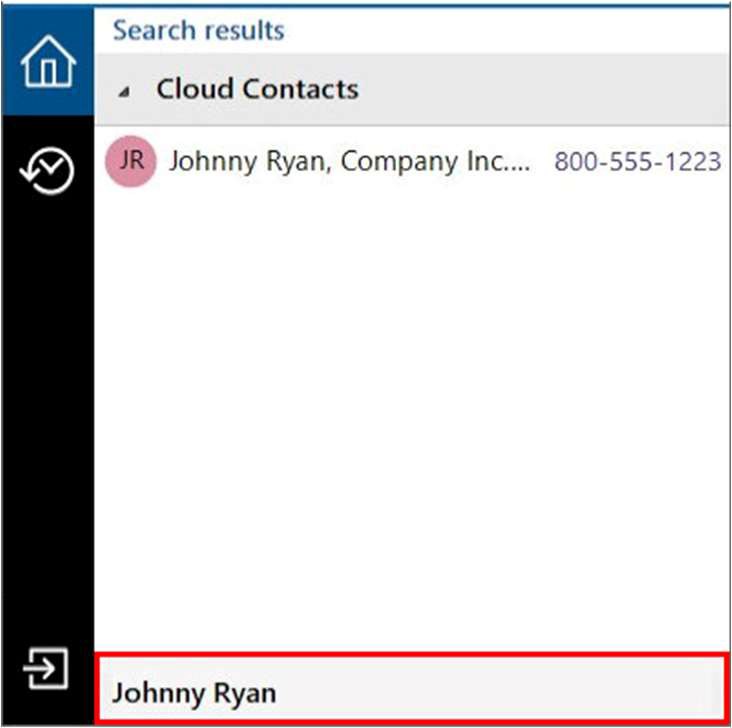
As shown here, you can also type a contact’s name (either full or partial) to initiate a search in, PBX directories and any integrated business applications.
If any matches are found, the search results are displayed directly within the System Tray pop-up, and you can click a displayed number to dial it.
Recent Calls
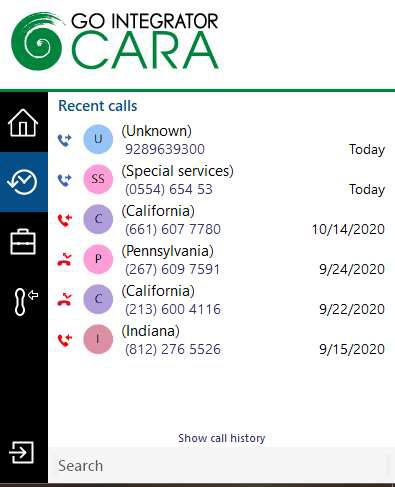
The “Recent Calls” option displays a list of your most recent incoming and outgoing calls. Click any of the items in the list to quickly re-dial.
This is particularly useful for reducing the time spent locating and dialing numbers, especially when contacts are regularly dialed and then re-dialed in a short space of time.
Call History
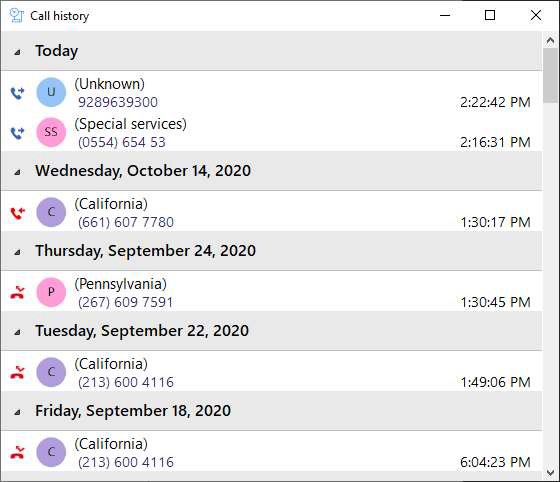
The “Call History” option displays a list of your most recent inbound and outbound calls, and it also displays your missed calls - ensuring that you never miss that important incoming call. A customization option allows these call logs to be pulled from the BroadWorks platform.
Clipboard Dialing
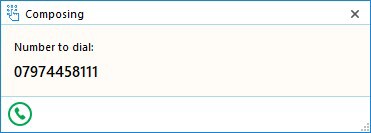
If you copy into the Windows clipboard what appears to be a phone number, a discrete pop-up is automatically displayed offering you the option to dial that number. Just click the dial icon to dial it.
Web Page Dialing
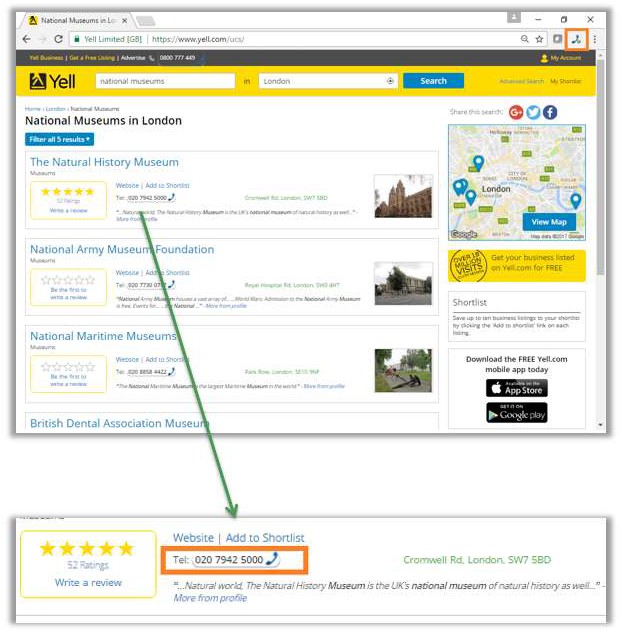
Cara can also recognize telephone numbers in web pages and will convert them to hyperlinks so that you can click-to-dial directly from the web page.
Screen Read Dialing
Cara also introduces “Screen Read” dialing (Patent Pending). Screen Read allows you to click-to-dial from any number type on the screen even those presented as an image. The user will hover over the number with their mouse and select ‘shift’ and ‘ctrl’ at the same time on the keyboard to initiate Cara to read the phone number.
The example below shows it working in an email signature.

Focus Dialing
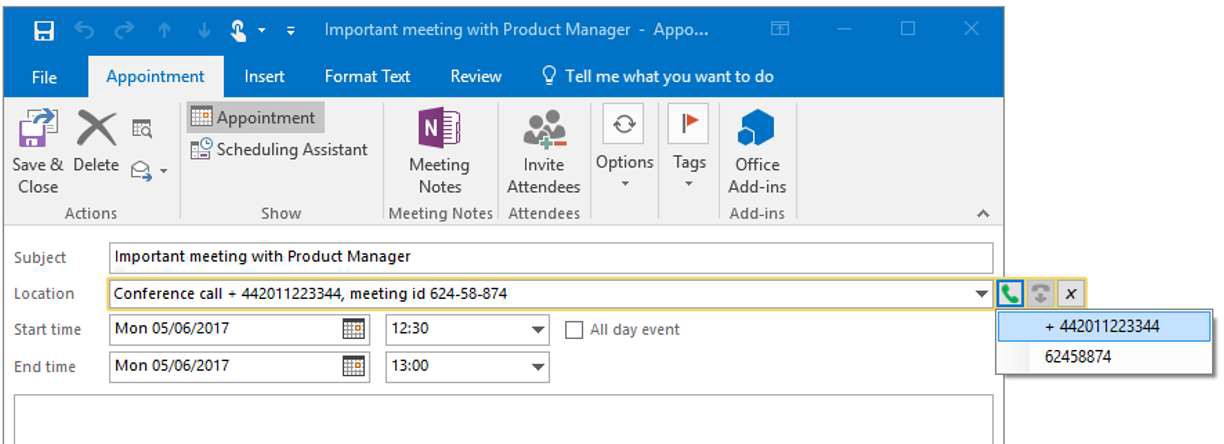
Focus dialing offers a similar click-to-dial capability within applications. Once enabled, it will automatically detect fields that contain dial-able numbers and presents a click-to-dial icon to the right of the field.
If the field contains more than one potential telephone number, a drop-down is displayed when you hover over the icon, allowing you to select which number to dial.
Microsoft Teams Integration
Cara supports a range of integration features with Microsoft Teams including:
Show, Add, Pop Business (CRM) Application/s contact for call ringing / answered using Teams##
Select Teams as preferred dialing device#
Open MS Teams chat from Cara Presence
Show photo / avatar in Cara Presence
Show peers Teams availability### (beta)
# Require MS Teams direct routing (or similar) / Microsoft 365 Business Voice
## Require MS Teams direct routing (or similar)
### Currently available as a customer beta feature only with limited support. Feature may change without notice.
CRM Integration
Cara provides integration to a wide range of different CRM and Contact orientated Business Applications. Integration provides a range of set integration features from the list below. Up to four Add-ins can be concurrently configured.
Caller Preview
Displays the caller's name in the Call Preview window when a match is found between the caller’s number and the contact information stored in the integrated application(s).
Contact Popping
Instantly open the caller’s contact record in the integrated application by clicking the application's icon in the Caller Preview window.
Adding a contact
Instantly add and edit a new contact record in the integrated application by clicking the add contact icon in the Caller Preview window.
Contact Searching
Enables you to concurrently search all configured integrations and pop the contact record or click- to-dial from the results.
Activity Logging
Manually or Automatically create a history (Activity) log of a call received within the Business (CRM) Application/s and add notes.
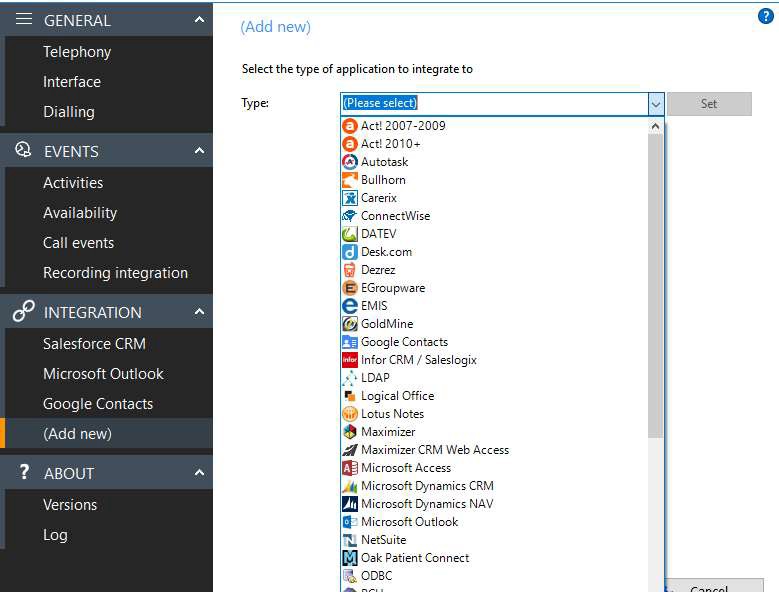
To set up an integration just select the “(Add new)” from the Configuration page and select an Application and click Set. To get help on setting up the integration just click on the blue help circle.
Always check the Cara website to get the latest information on supported integrations.
Call Settings
You can manage your call settings through the System Tray Menu and AppBar.
You can configure and modify your settings for Call Forwarding, Anywhere, Remote Office, DND / Hide Number, In Office, and Outgoing As.
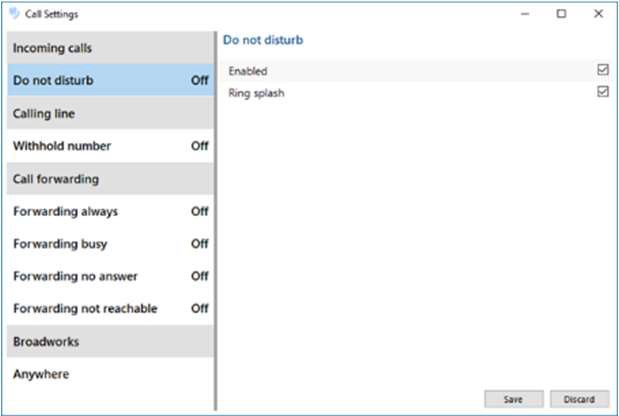
The various tabs on the Call Settings page in the configuration are only displayed for the services that are assigned to you.
Miscellaneous Features
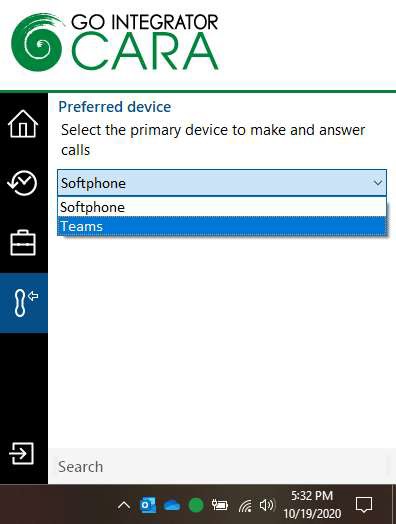
Device Control and Preferred Device
Cara will monitor all primary and shared devices associated with your user account and allow you to select which device you can answer a call on or make a call from (known as Preferred Device). You can also decide to stop monitoring certain devices altogether if you wish. Preferred devices can also include your mobile phone and Microsoft Teams.
Missed Call support
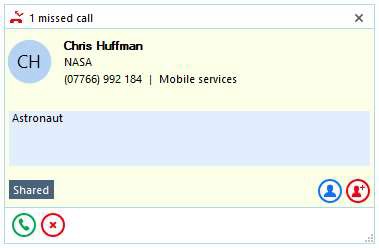
A pop-up window will show on the screen when a call has been missed. Multiple options are available from this including call back, pop contact and add contact.
Cloud Contacts
Cara can easily store a new contact as a private or shared contact with co-workers. It is also a very effective way to share and add a contact to the disparate contact management systems within a company. This process begins by adding a contact to the Personal Contact list, then selecting the Integrated Business (CRM) Application/s the user wants the contact stored in. This feature is not available as standard so please check with your service provider if they provide this.
Configuration
Cara configuration is accessed through the AppBar (left) or the System Tray Menu (right).