Microsoft Teams Calling User C & D packages will be end of life from 30th September2025
Microsoft Teams Calling User C & D packages use the Microsoft Teams Calling HPBX business service and user service that utilises the Call2teams service to enable calling within the Microsoft Teams environment.
Please view the different packages here
Requirements
NOTE - this new service can be run alongside the Microsoft Teams Calling SIP Integration service. If you want to run both simply also assign this new HPBX service to the business.
Business Service
Next you need to ensure that you have added a tariff for the Microsoft Teams HPBX Business Service. This is a "zero charge" business service.
User Packages
There are 2 Microsoft Teams Calling User packages for this and 1 of these needs to be assigned to each user that wants to integrate calling with MS Teams.
Device
You also need to add a tariff for the Teams HPBX Device, this is a "zero rate" device.
Phone Numbers
Each user with a Microsoft Teams Calling package requires a DDI number, please make sure you have them available in your number pool.
Microsoft Phone System License
The end customer will require one of the following Microsoft licenses to allow the Call2Teams service to setup an auto attendant in the Teams environment, this license should be assigned before setting anything up for the customer in Uboss.
Licenses acceptable are:
Microsoft Teams Phone Standard without Calling Plans
E5
Microsoft 365 Business Basic or equivalent Business Licenses
Any Microsoft License that contains MS Teams, E.g. Business Basic or higher
Microsoft 365 Global Administrator Details
This is required so that the Global Administrator can receive the synchronisation emails and then login to the Call2Teams portal and perform "Sync Now" requests.
How to Make the Device Available
1. Login to Uboss, go to Billing>Tariff>Tariffs
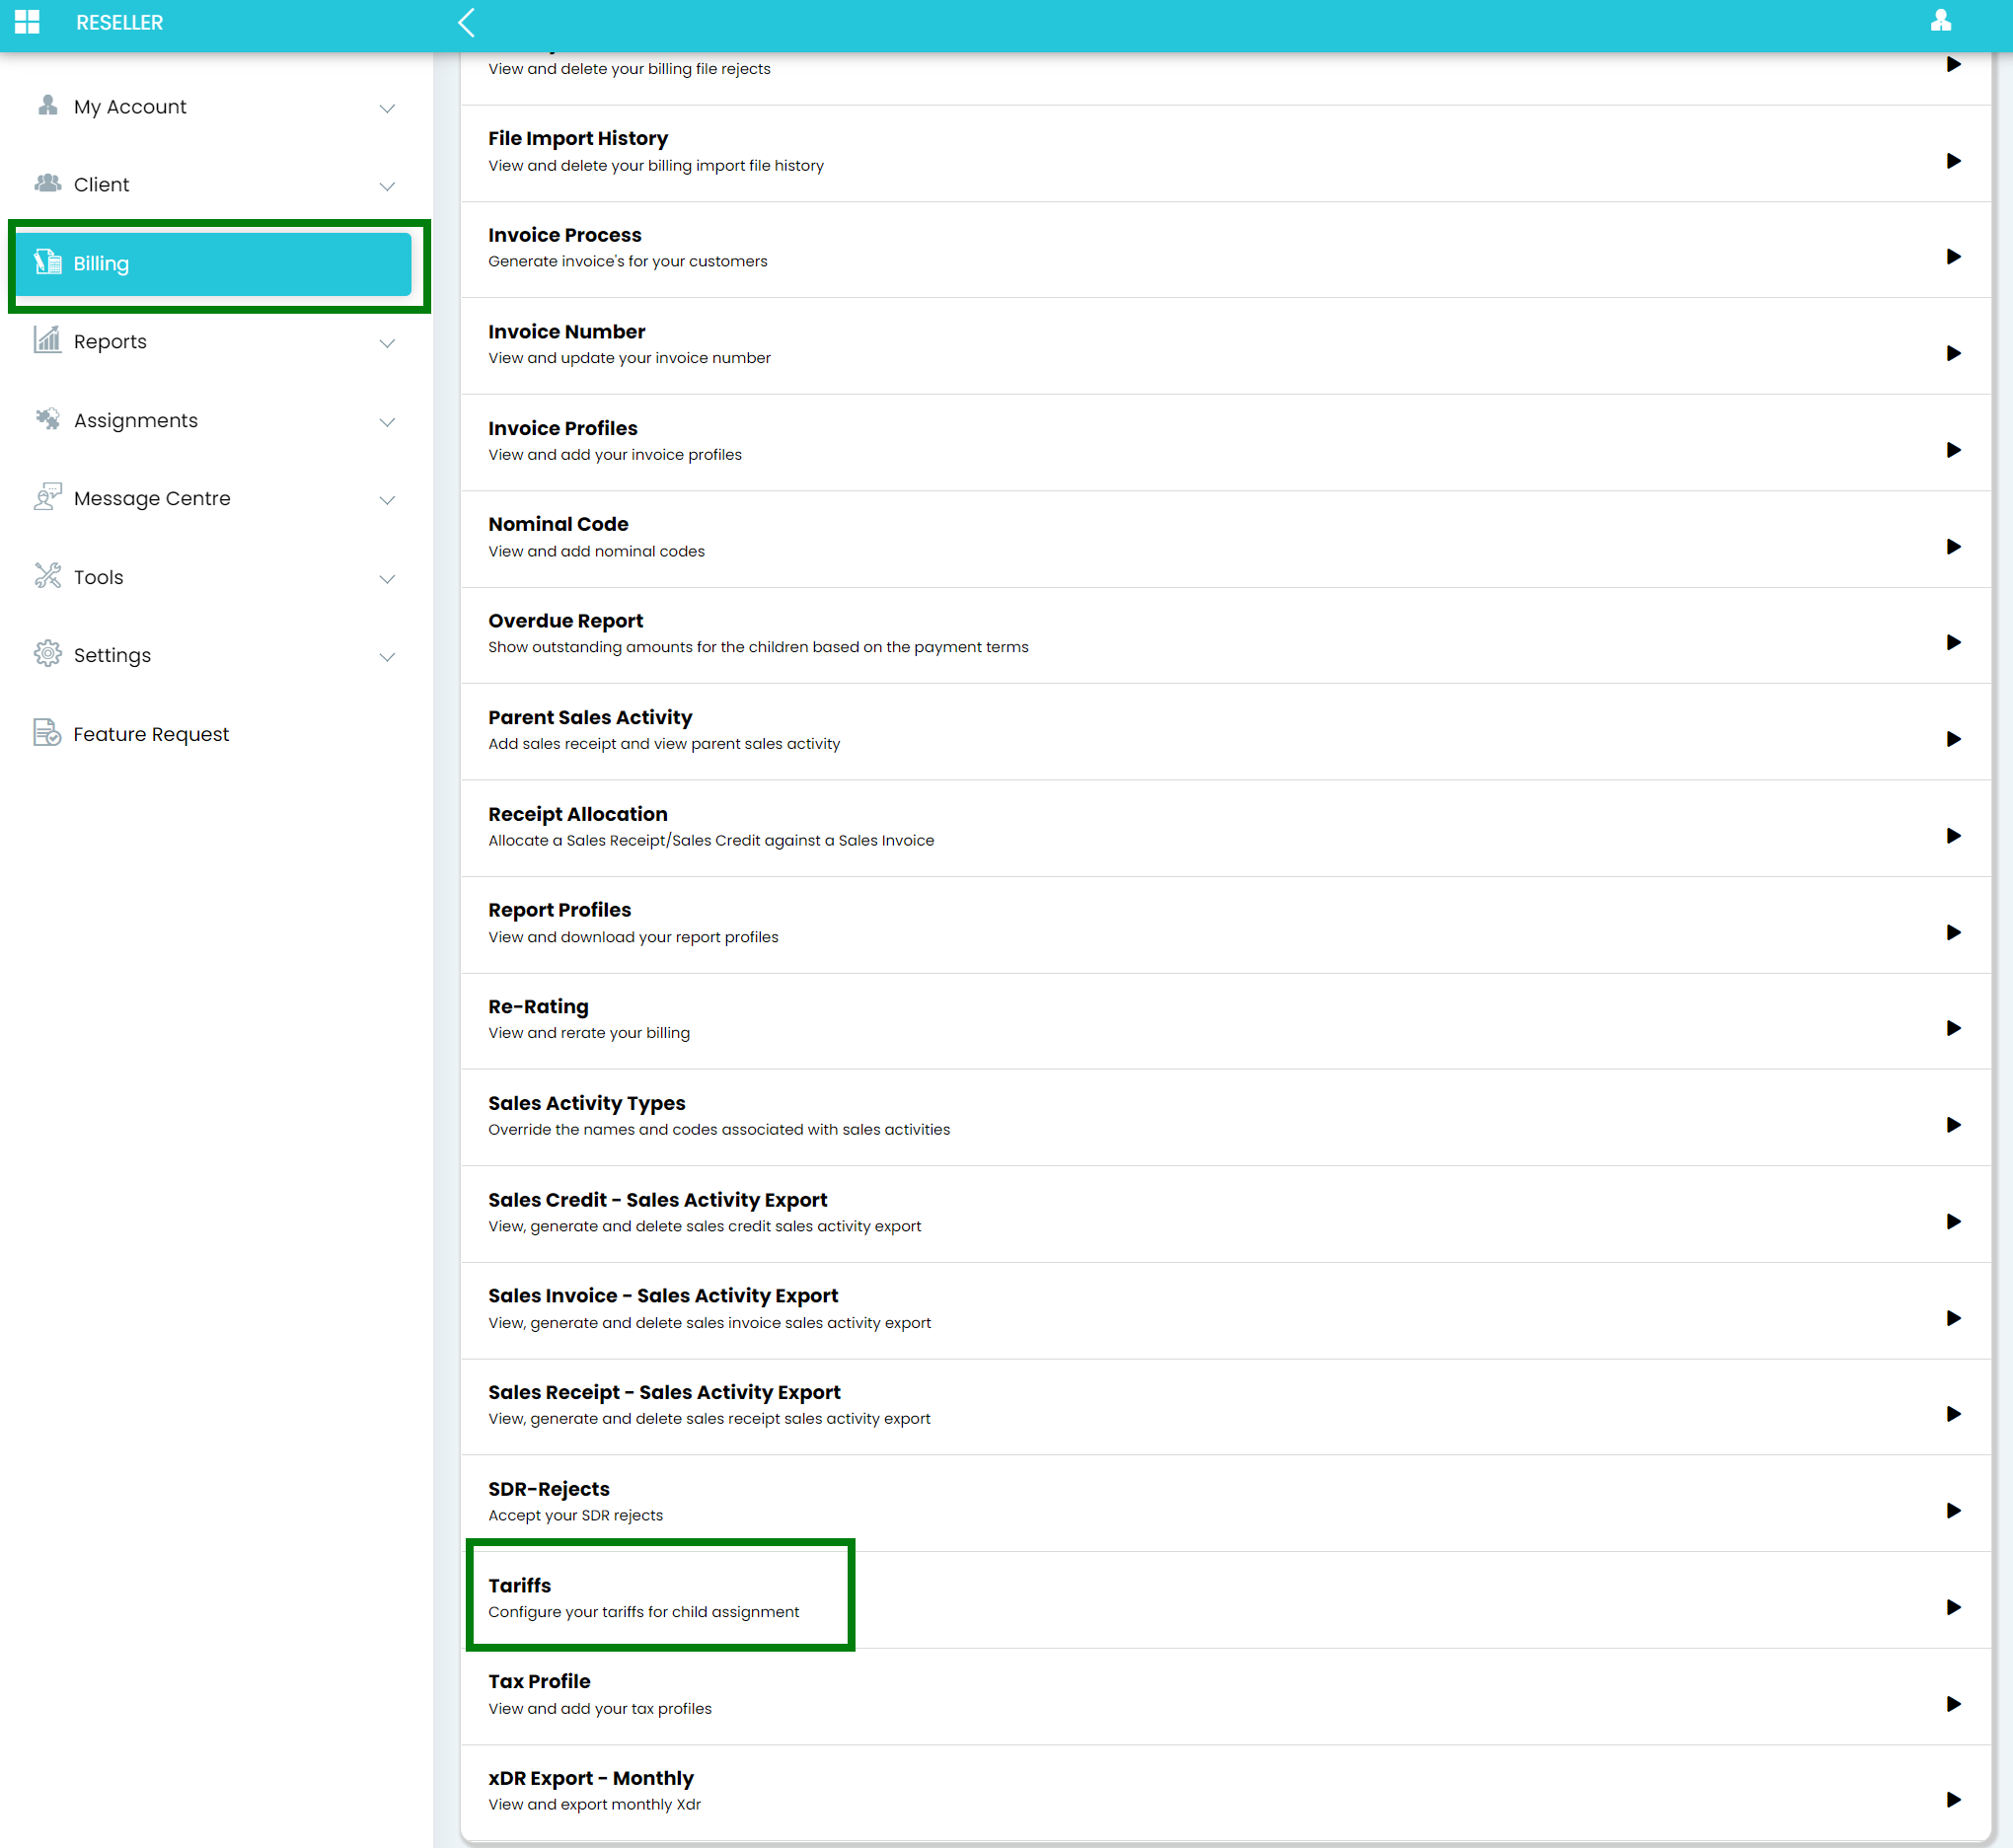
2.Select the appropriate SDR tariff
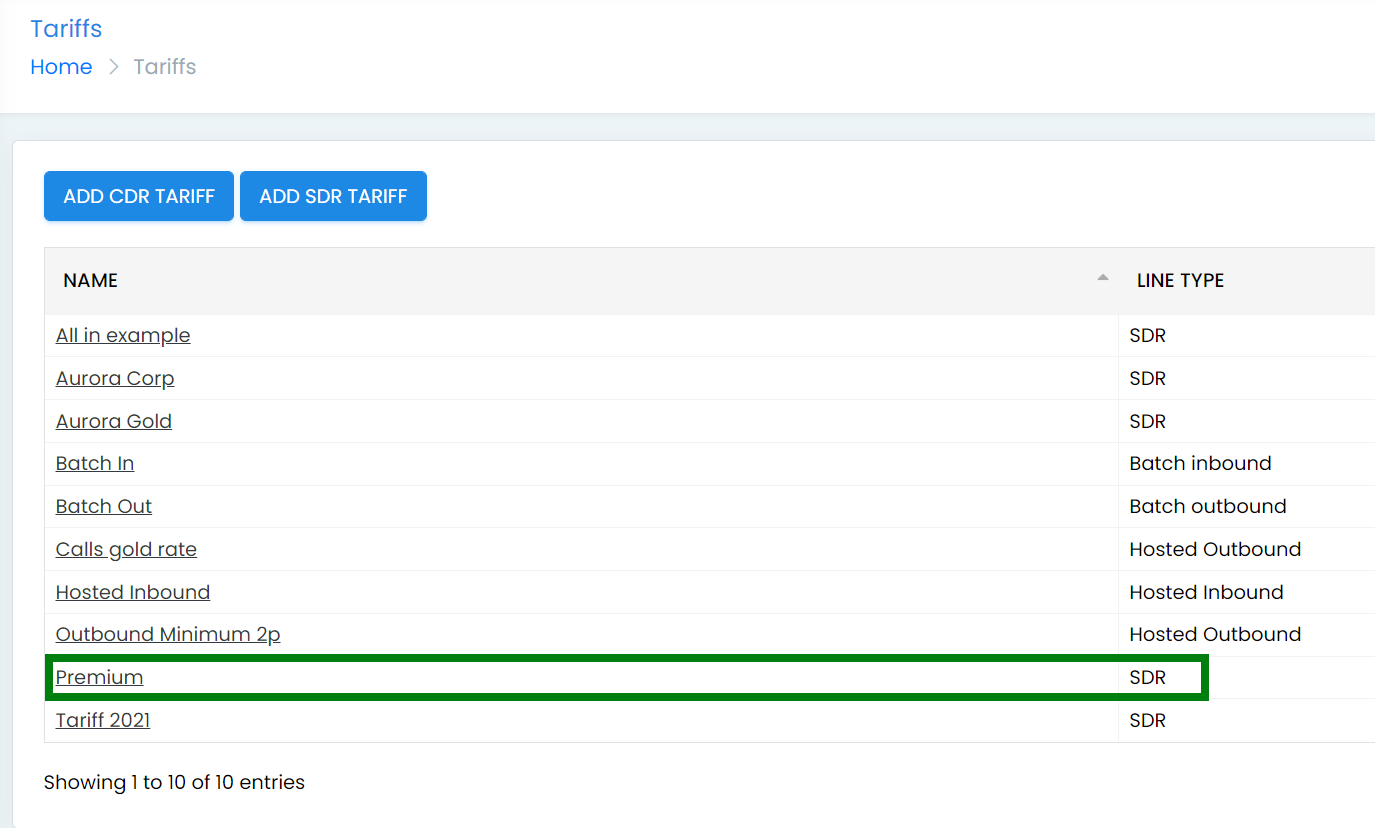
3. In the new window, go to the Devices/Accessories Tab and select the Teams HPBX device
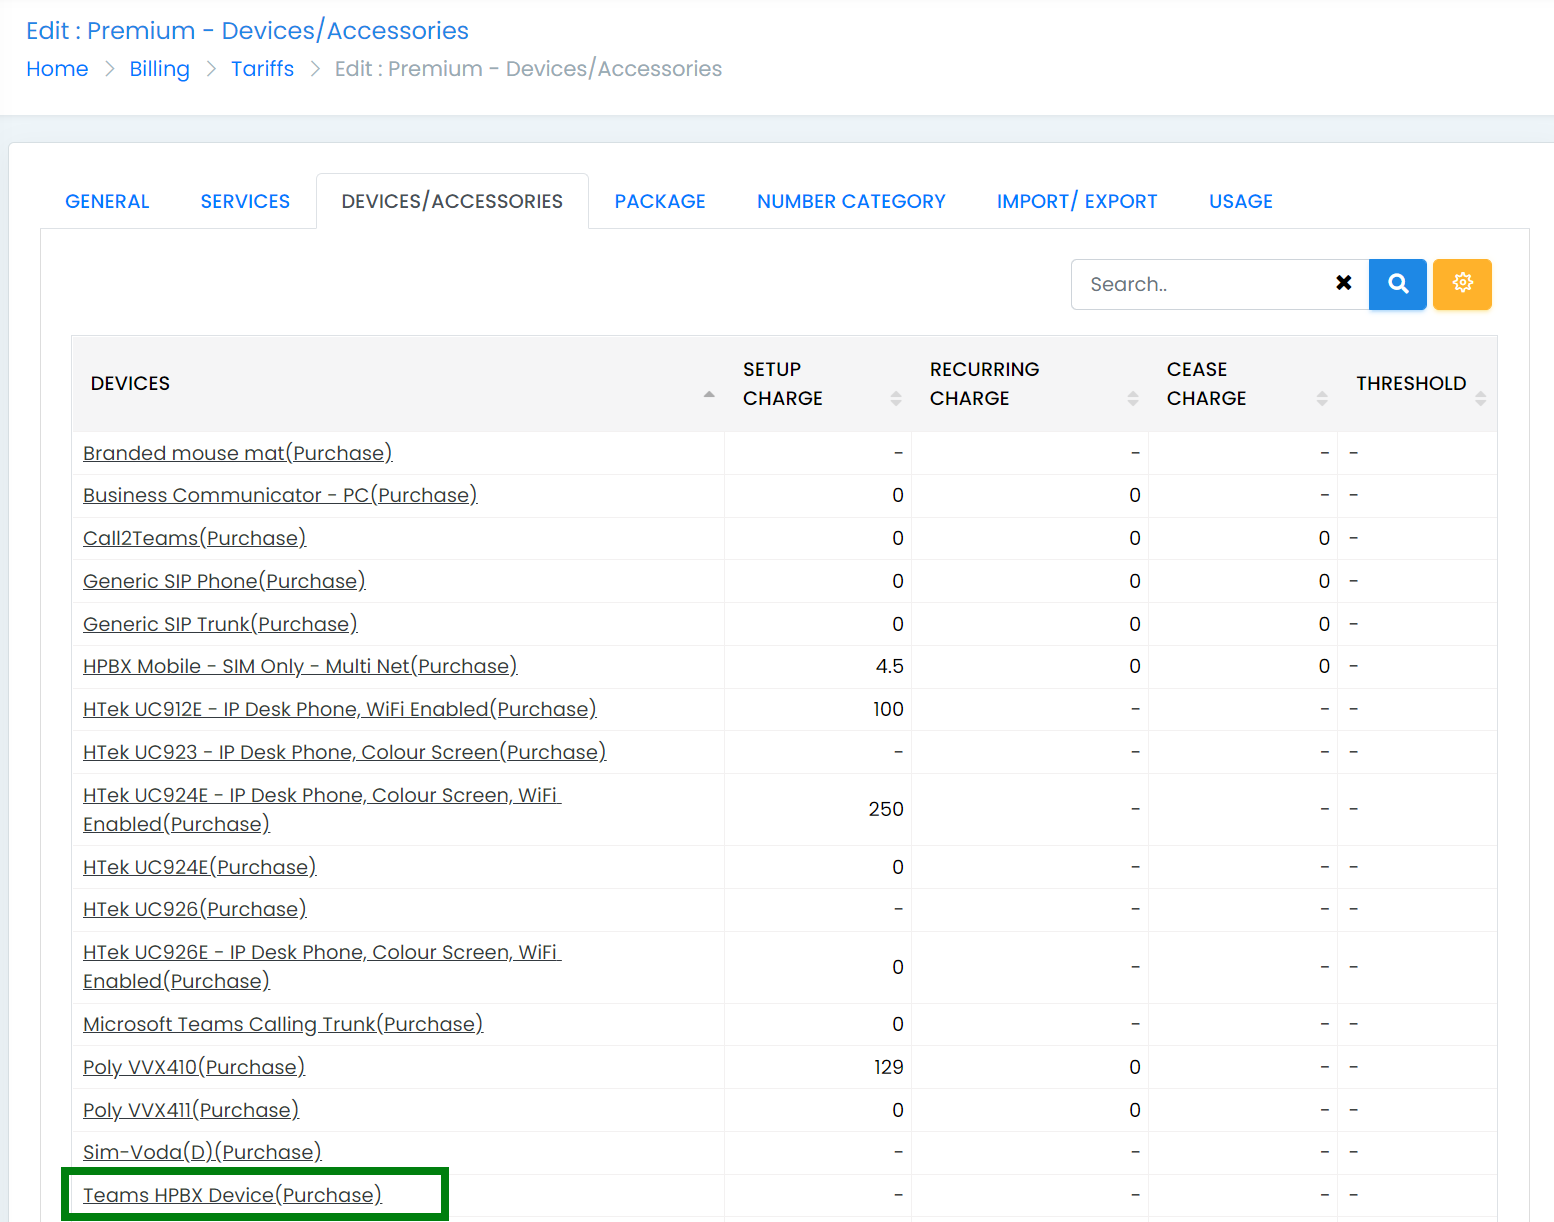
4. Complete the Setup charge and then press Save
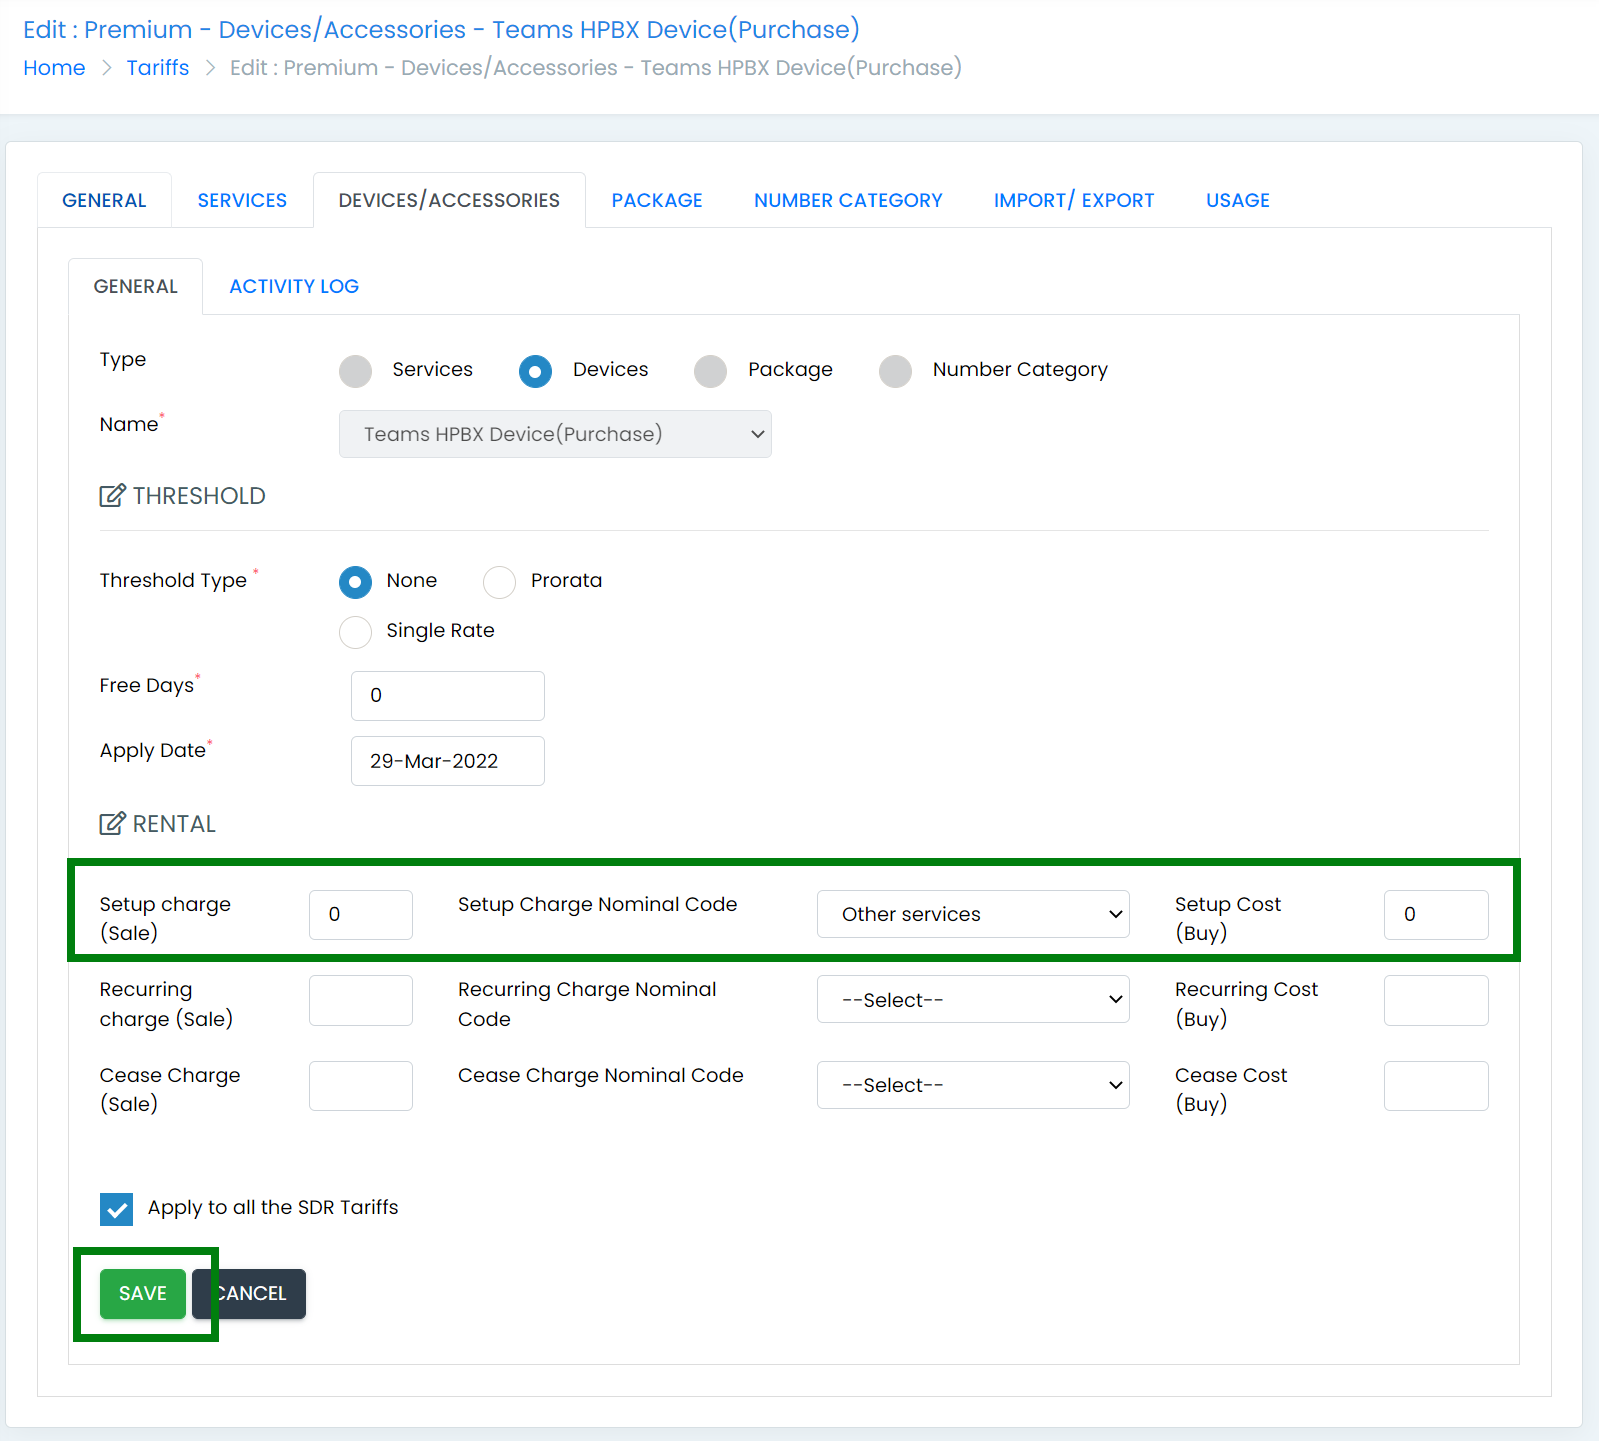
5. This is now complete.
How to Make the Business Service Available
1. Login to Uboss, go to Billing>Tariff>Tariffs
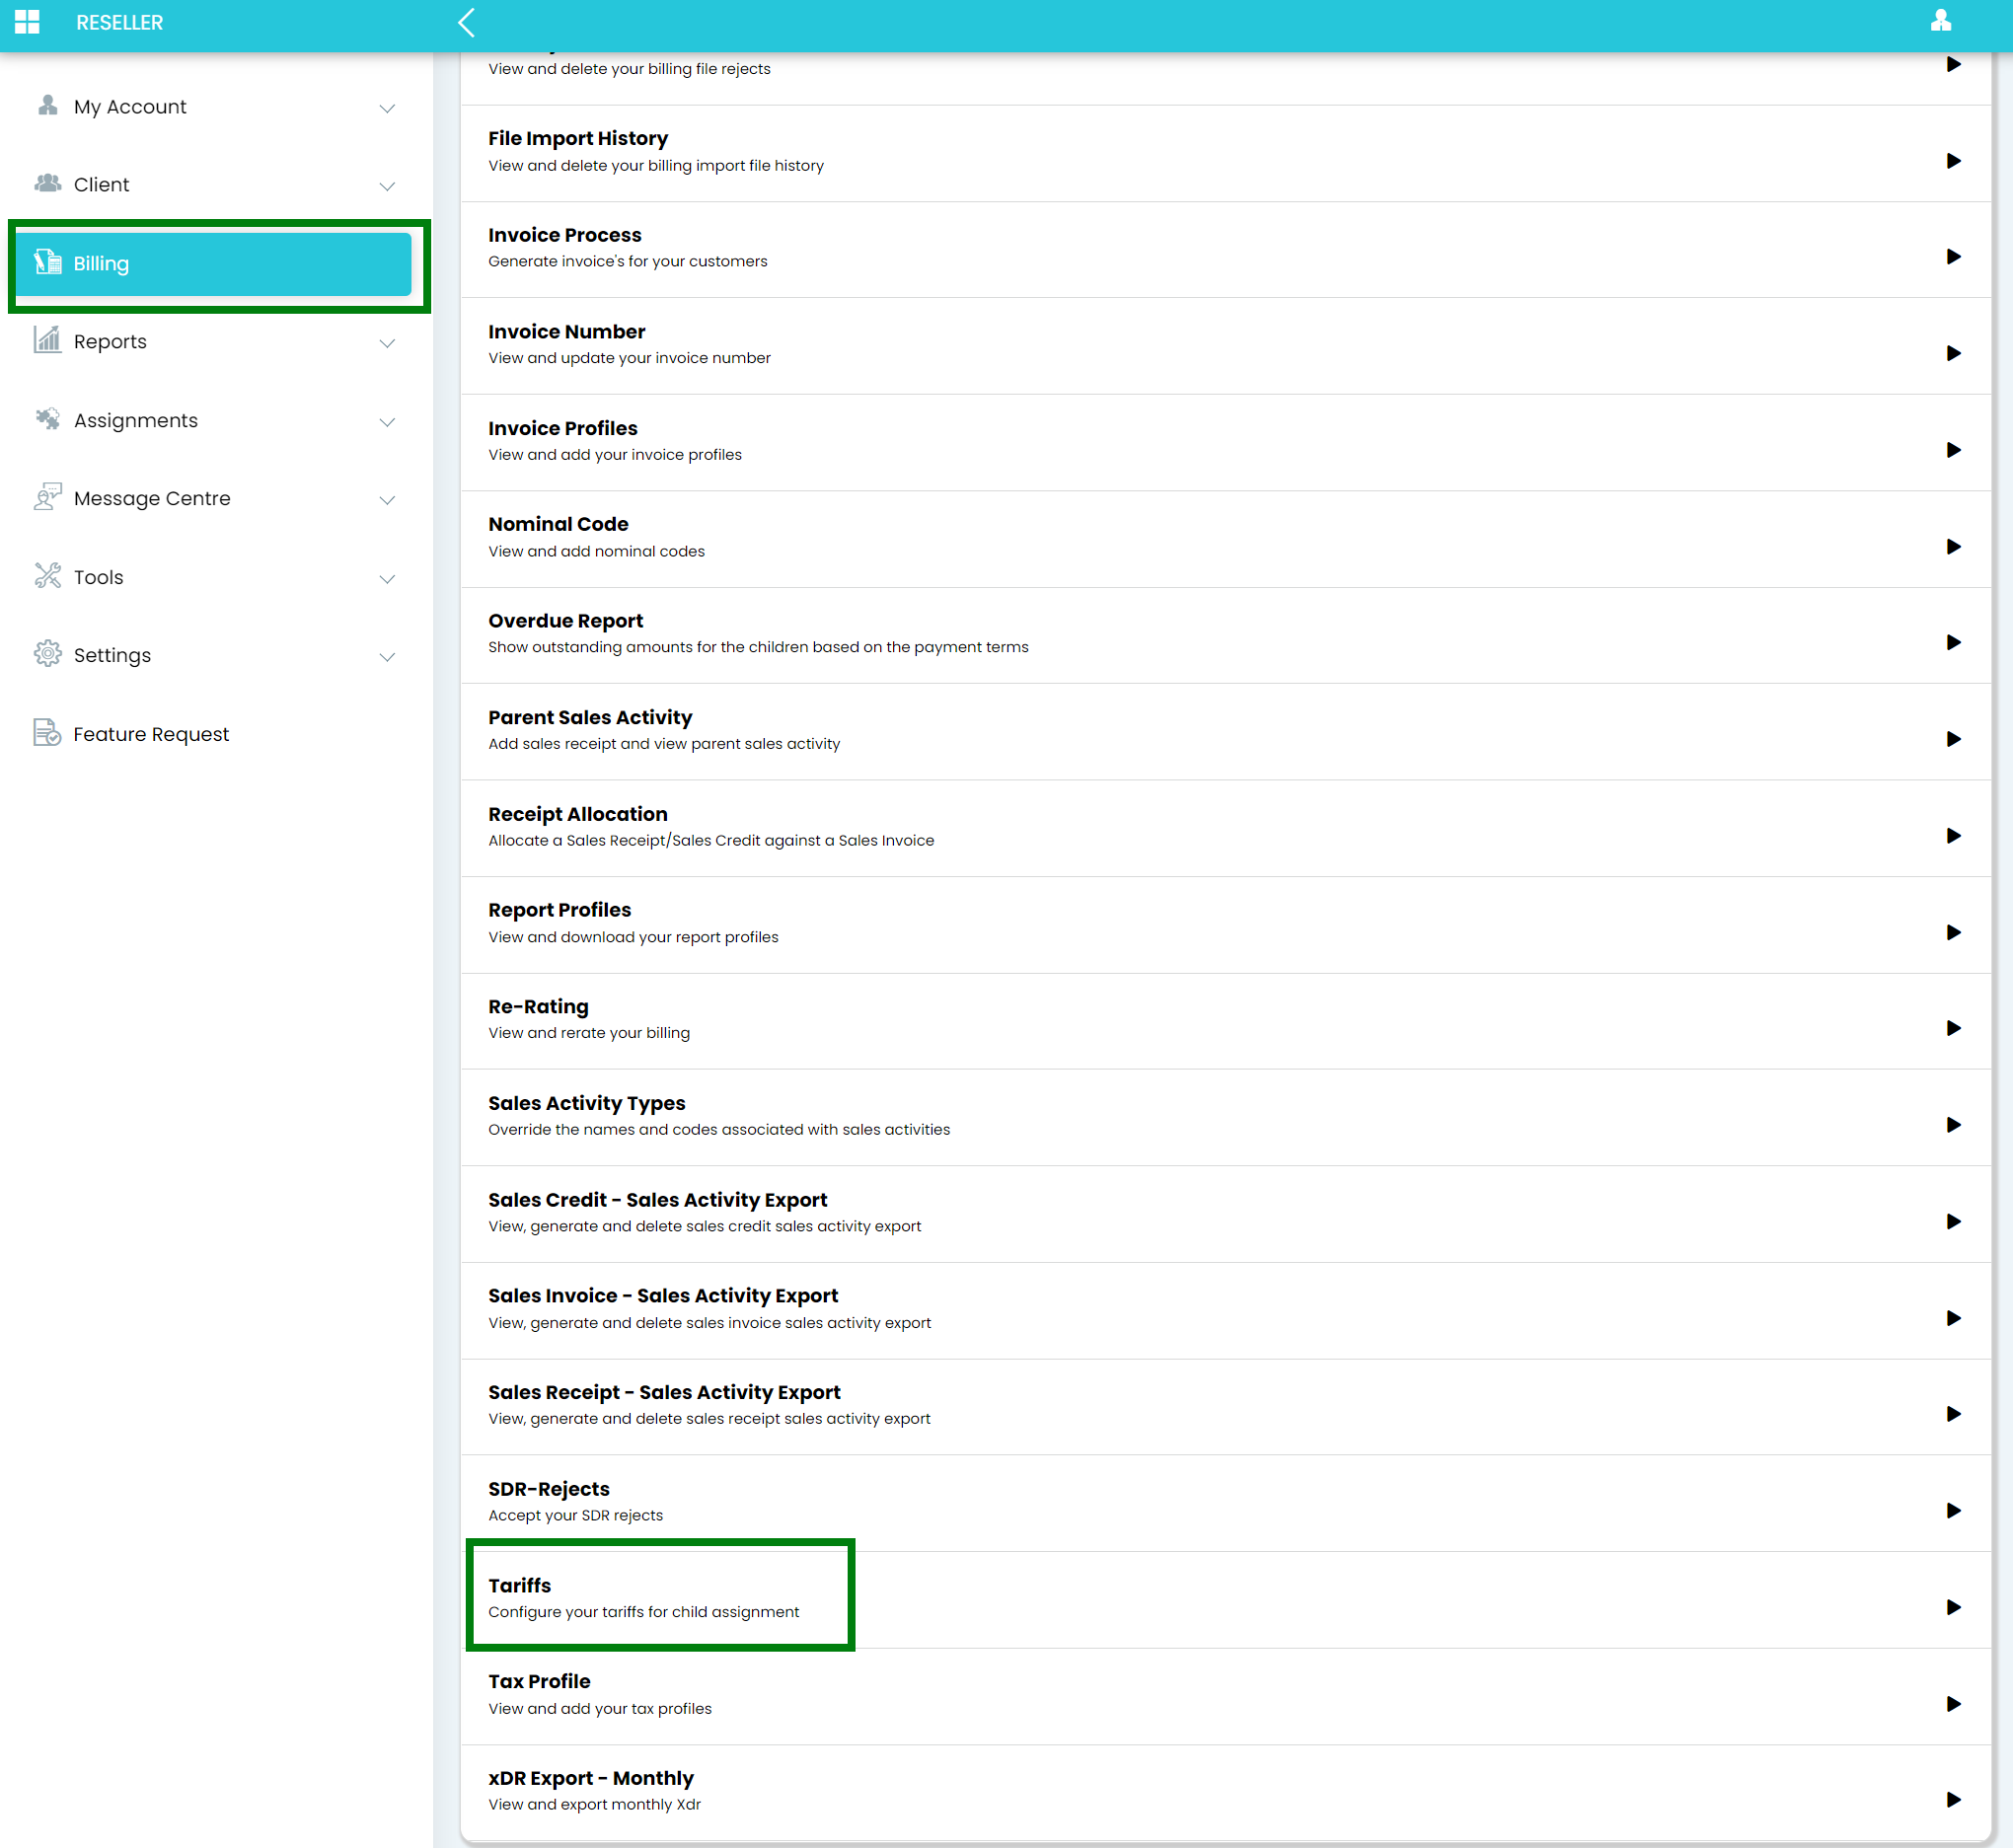
2.Select the appropriate SDR tariff

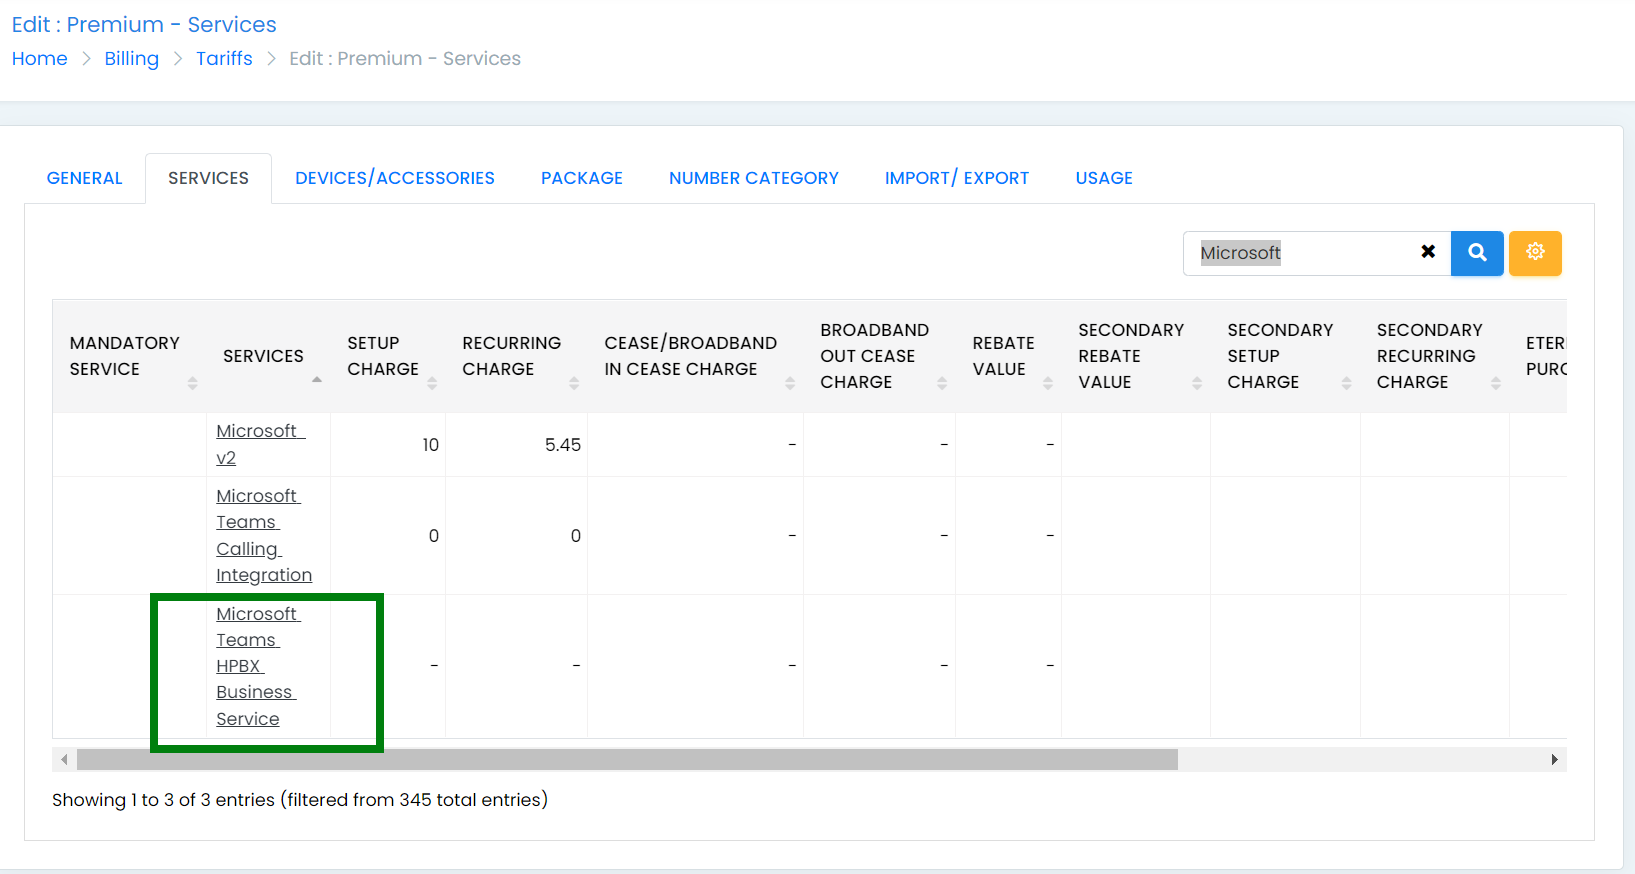
3. In the new window, go to the Services Tab, type Microsoft in the search box and press the search button

4. Now select the Microsoft Teams HPBX Business Service
5. Complete the Setup and Recurring charges with the relevant prices and then press Save. If you wish to apply the same prices to all your other SDR tariffs, then selec the Apply to All the SDR Tariffs option.
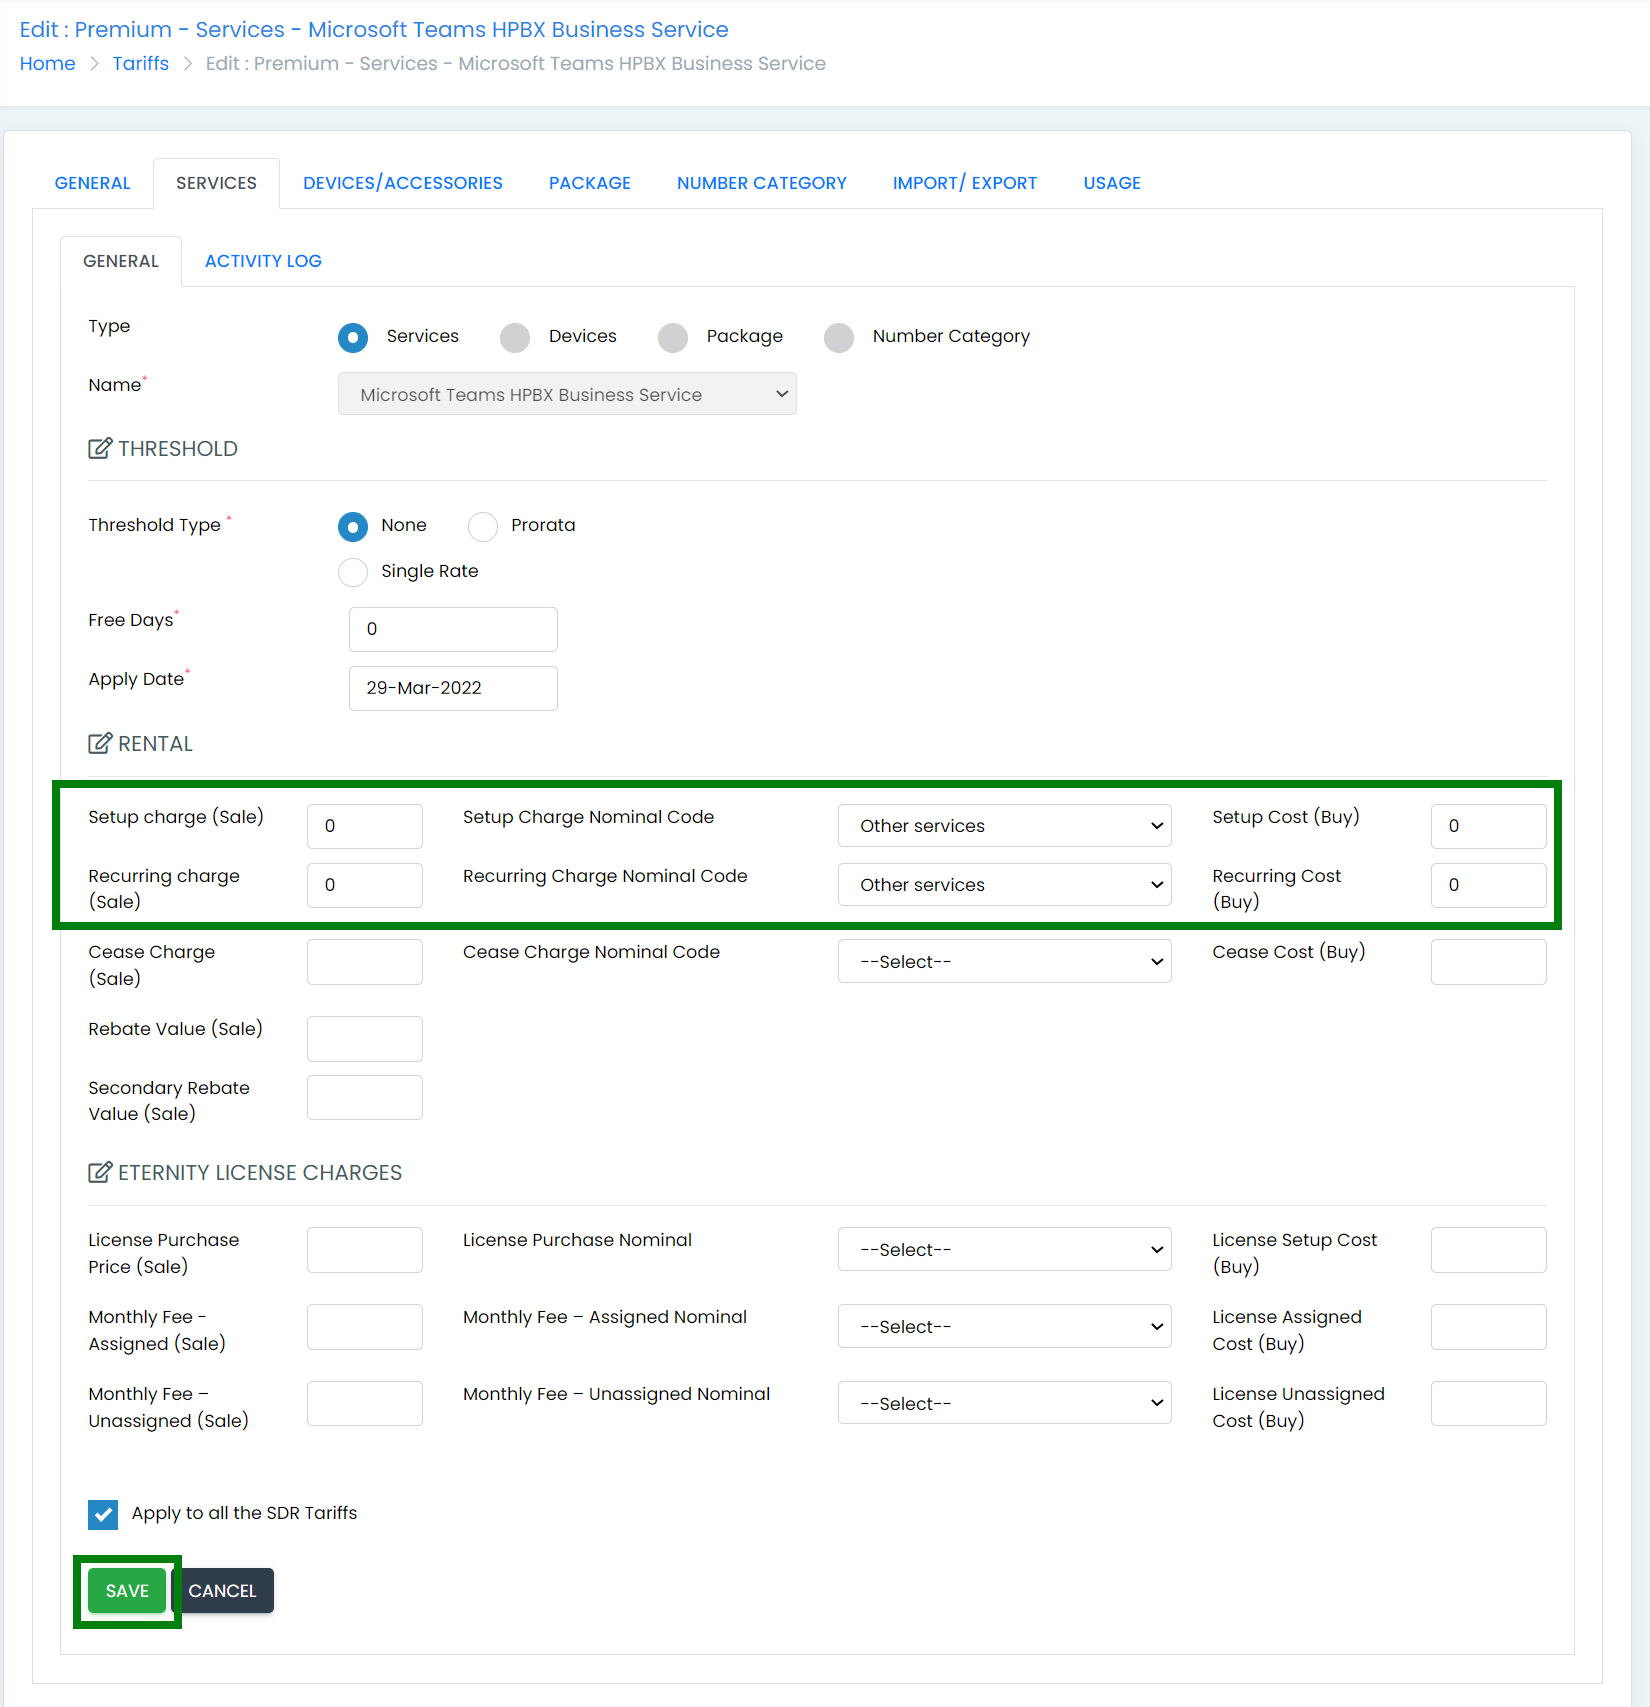
6. This is now complete and the business service will be available for assignment.
How to Make the Packages available
1. Login to Uboss, go to Settings>Service & Package>Packages
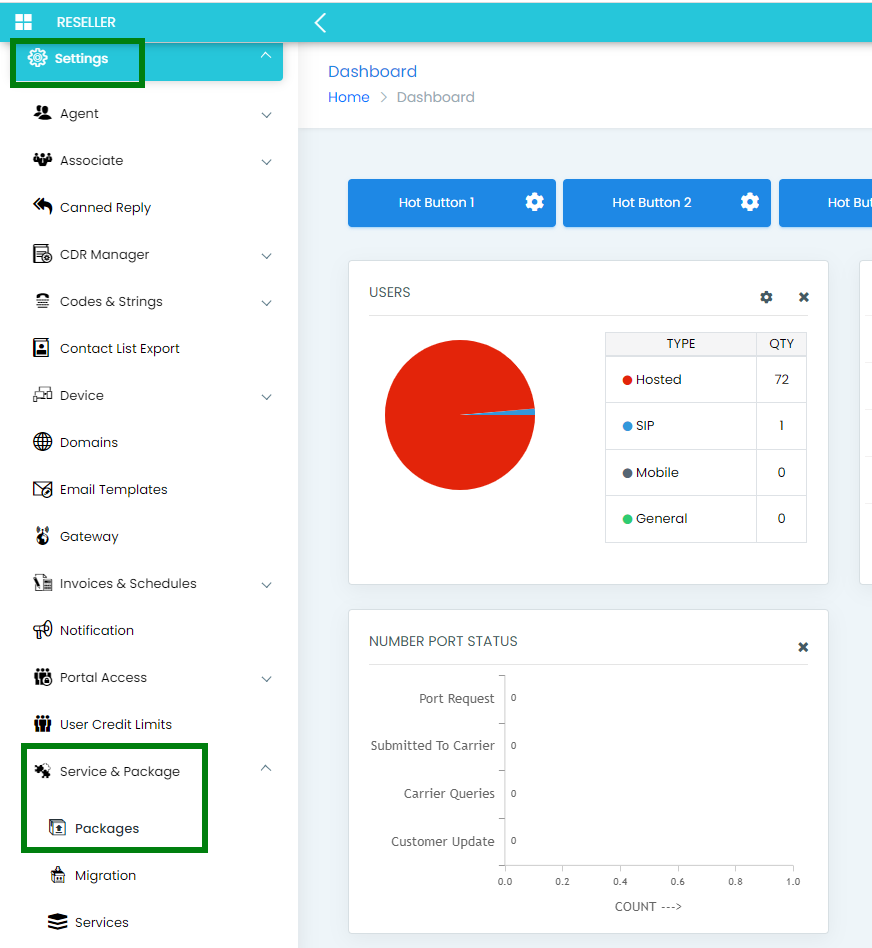
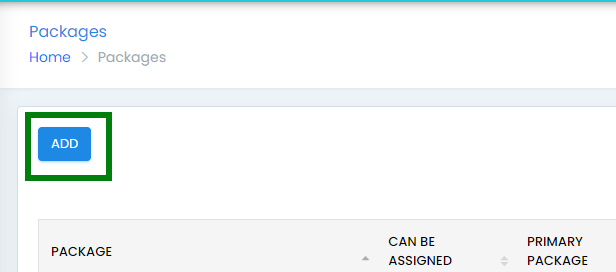
2. Select Add
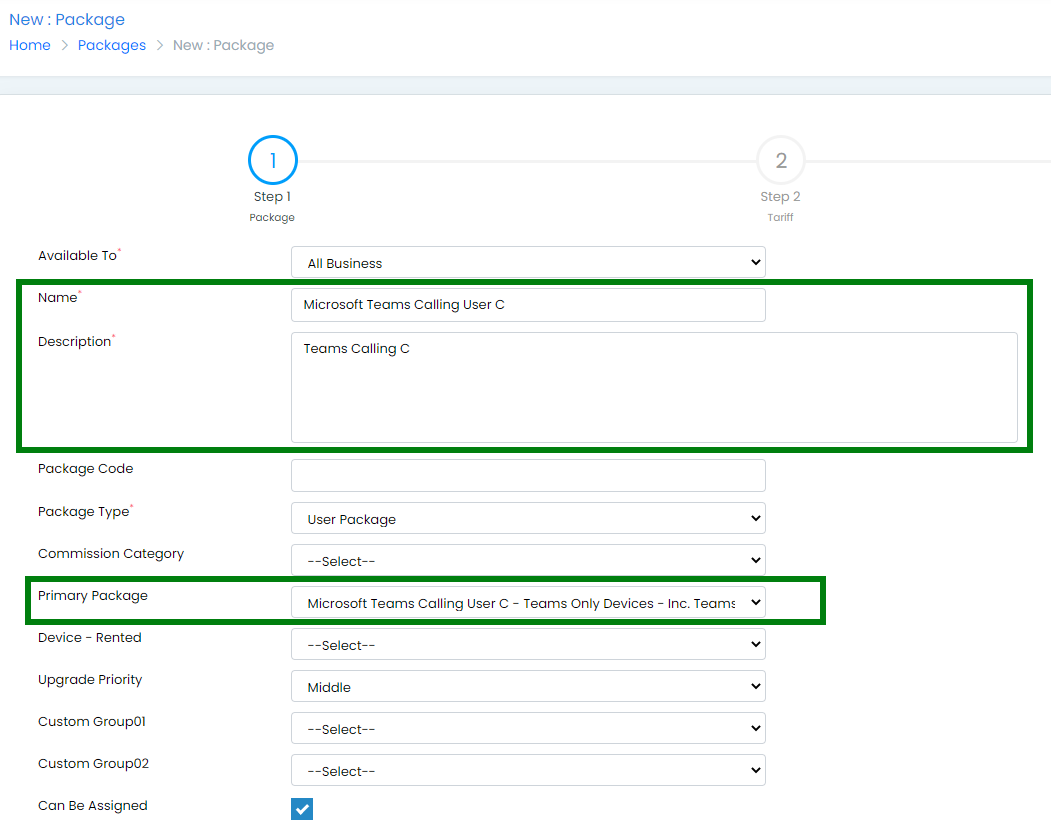
3. In the new window, enter a name and description for the package. In the primary package dropdown select the appropriate Teams Calling Package
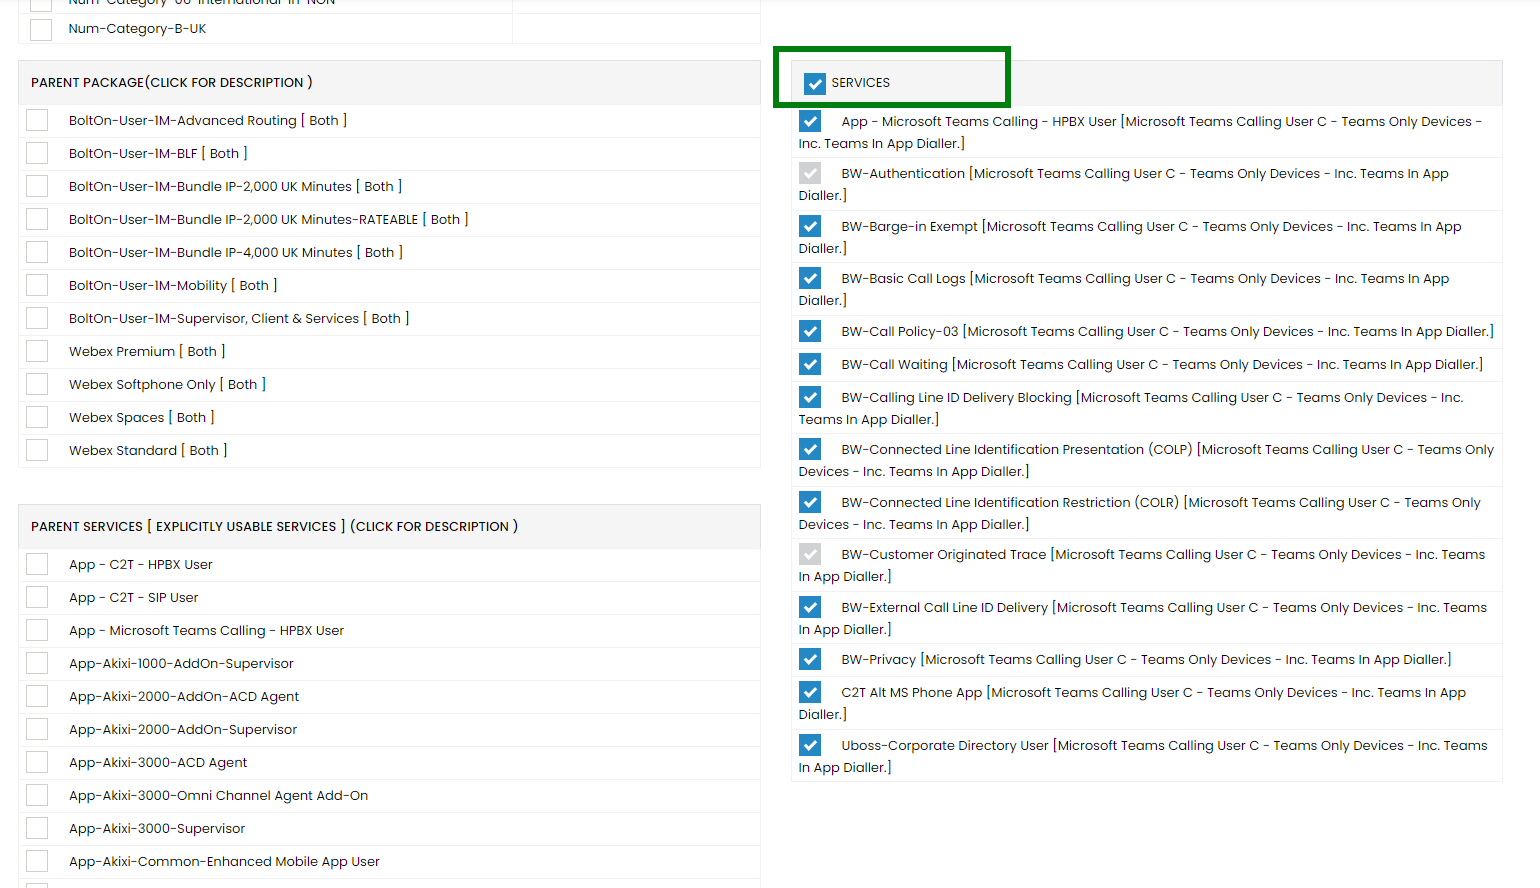
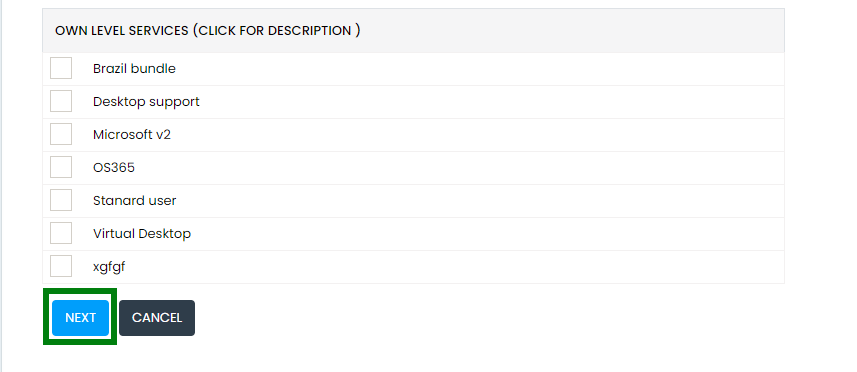
4. Scroll down until you see a list of services on the right, check the box at the top to select all services
5. Scroll down and click Next
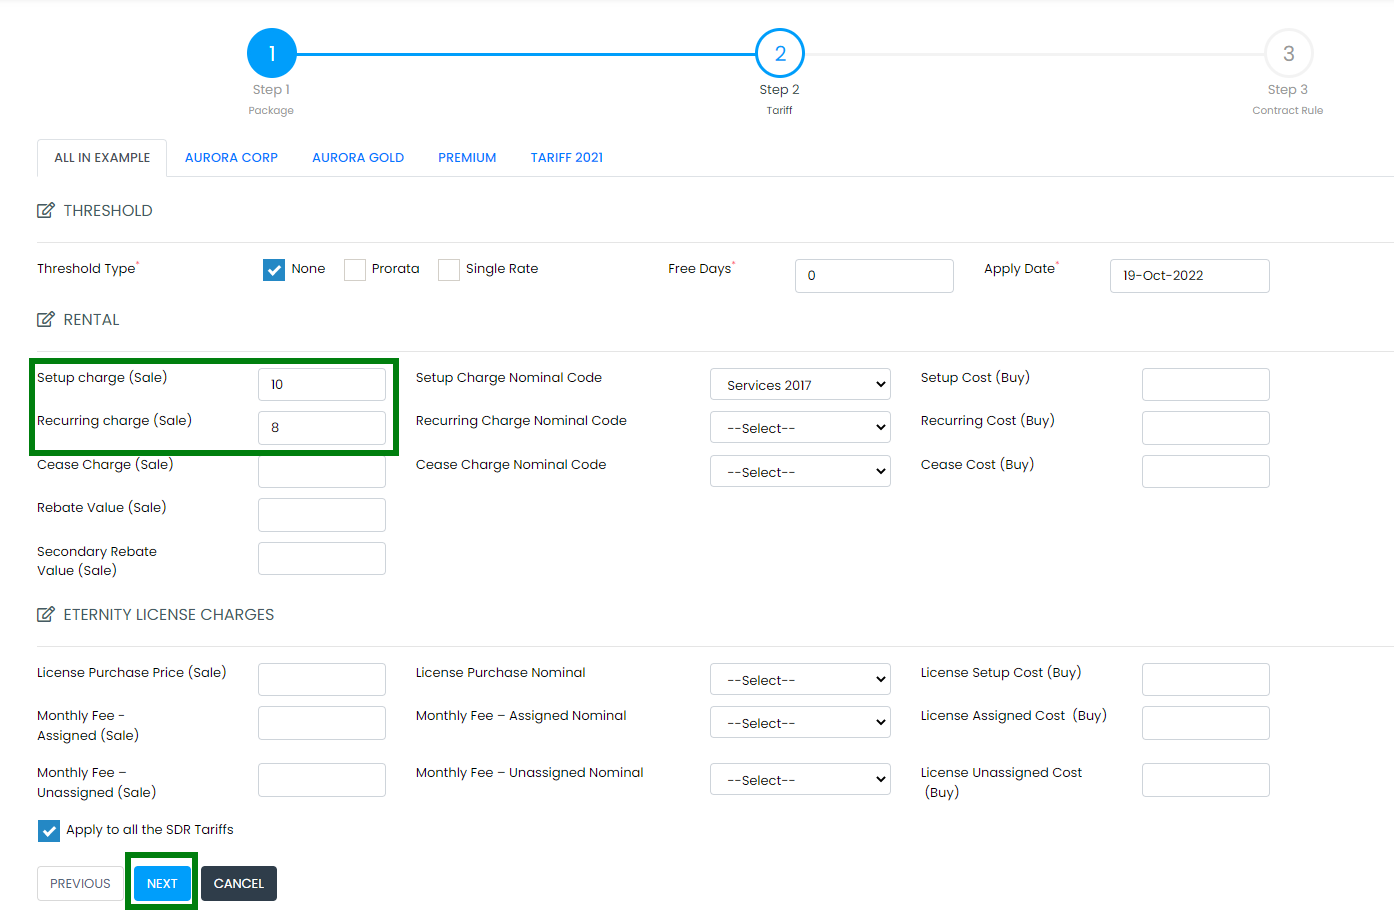
6. Complete the Setup and Recurring charges with the relevant prices and then press Next. If you wish to apply the same prices to all your other SDR tariffs, then select the Apply to All the SDR Tariffs option
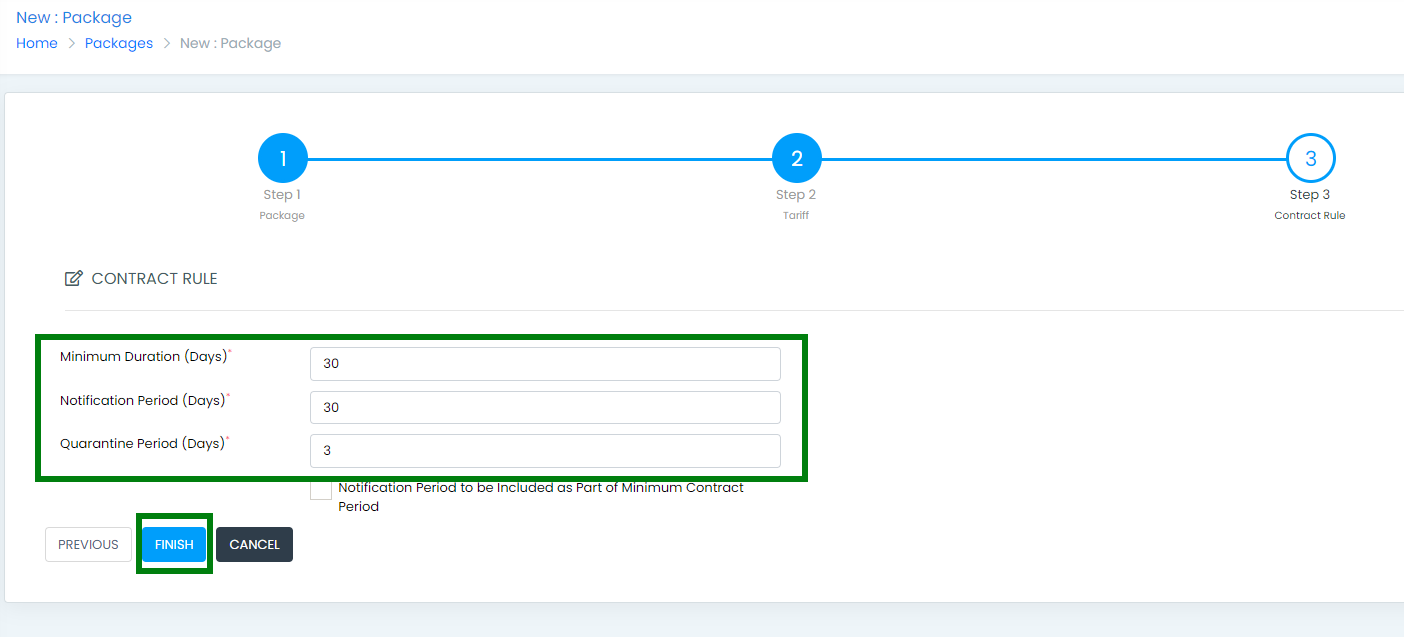
7. Fill out the contract rules and click Finish
8. This is now complete and everything will be available for assignment.
Service Setup in Uboss
Step One - Adding the Business Service
At the business level, go to Assignments>Service Assignments, and assign the Microsoft Teams HPBX Business Service

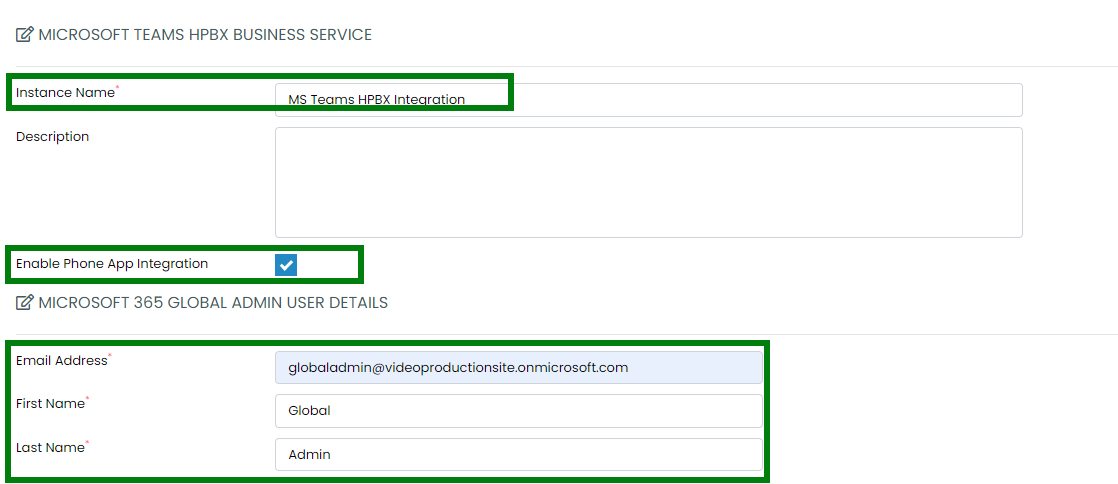
The following sections of the service wizard are required:
- Instance Name - The name or ID for the service
- Enable Phone App Integration - Must be checked when you are not using MS Teams Phone licenses
- Microsoft 365 Global Admin User Details - You must add the Email Address, first and last names for the end customers Microsoft 365 Global Administrator. You can add further Global Admins after the service has been added.
NOTE - If you are assigning this service in addition to the Microsoft Teams Calling SIP Integration then the admin name must be different, the email address can be the same
Step Two - Global Administrator Email Invitation
NOTE - If you are running this service in addition to the Microsoft Teams Calling SIP Integration, and you have already enabled the Teams sync, then you can just run a sync here
Once the service is added, the Microsoft 365 Global Administrator will receive a similar email to the below:
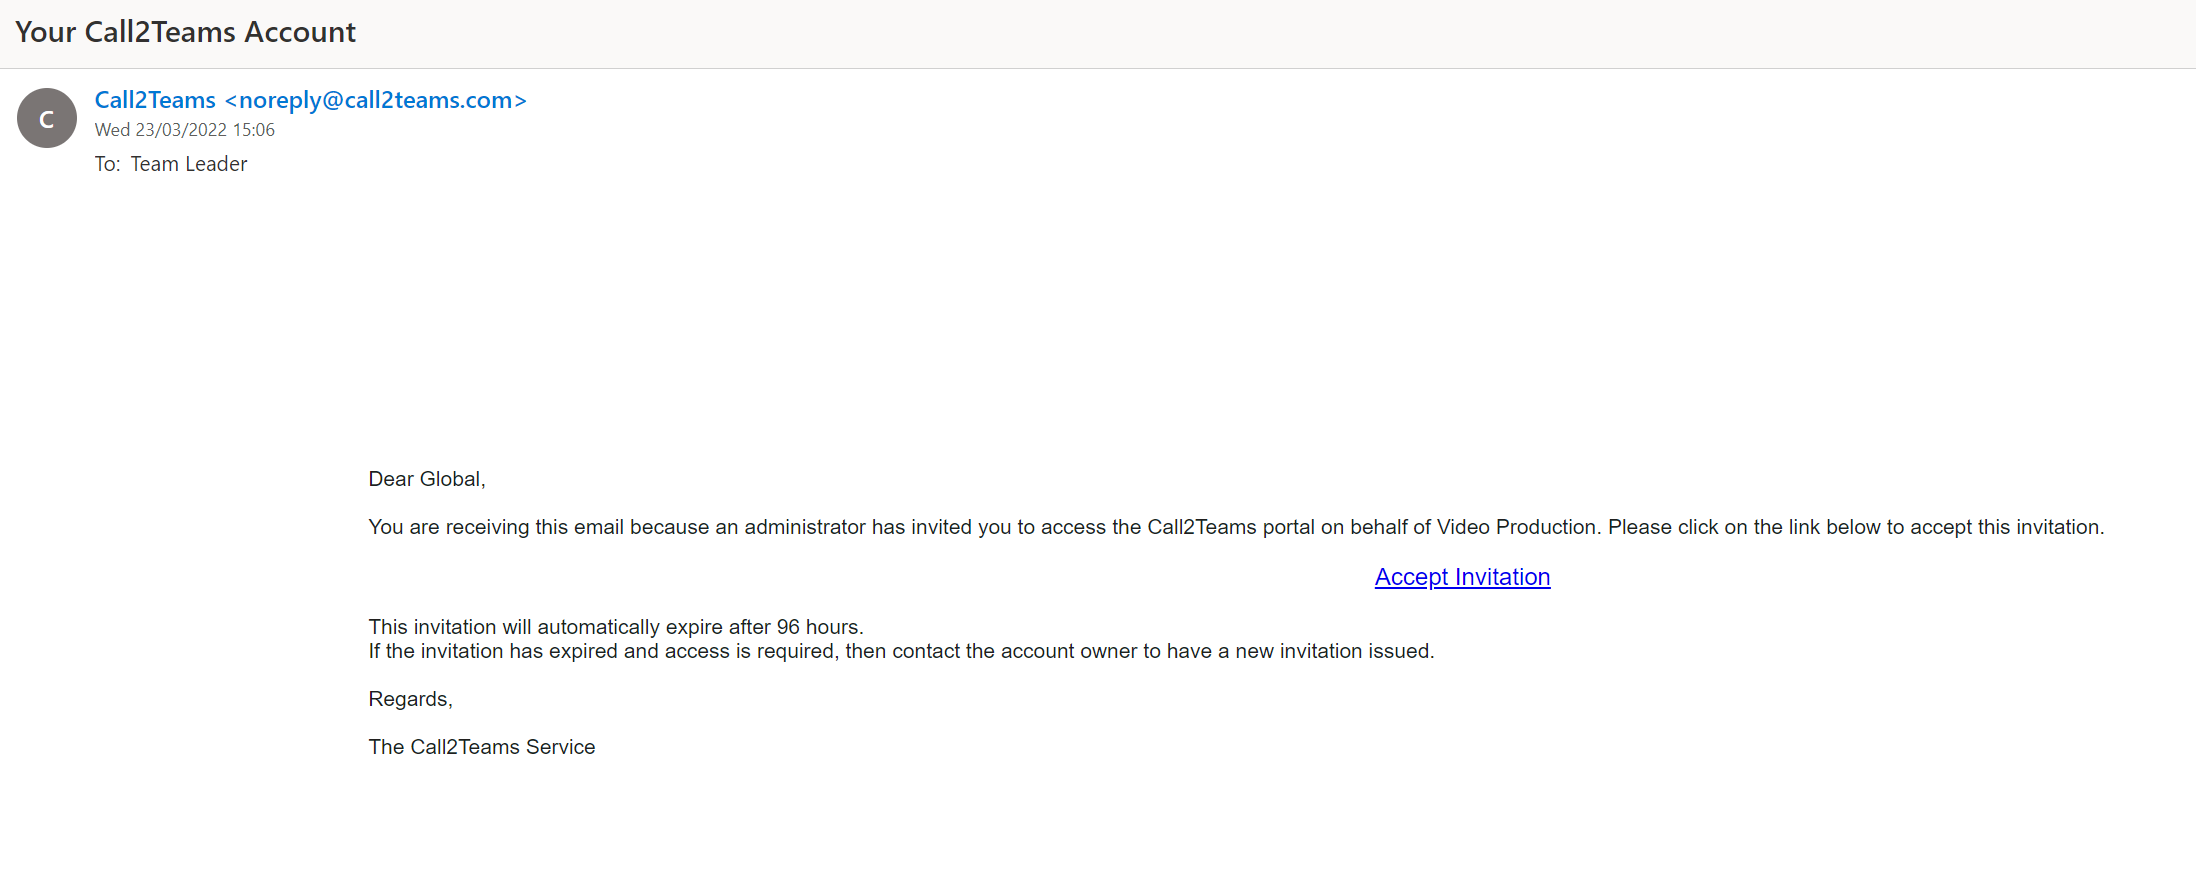
The Global Admin must click on Accept Invitation. This will take the user to the Call2teams portal. They must enter their login credentials for the Global Admin account.
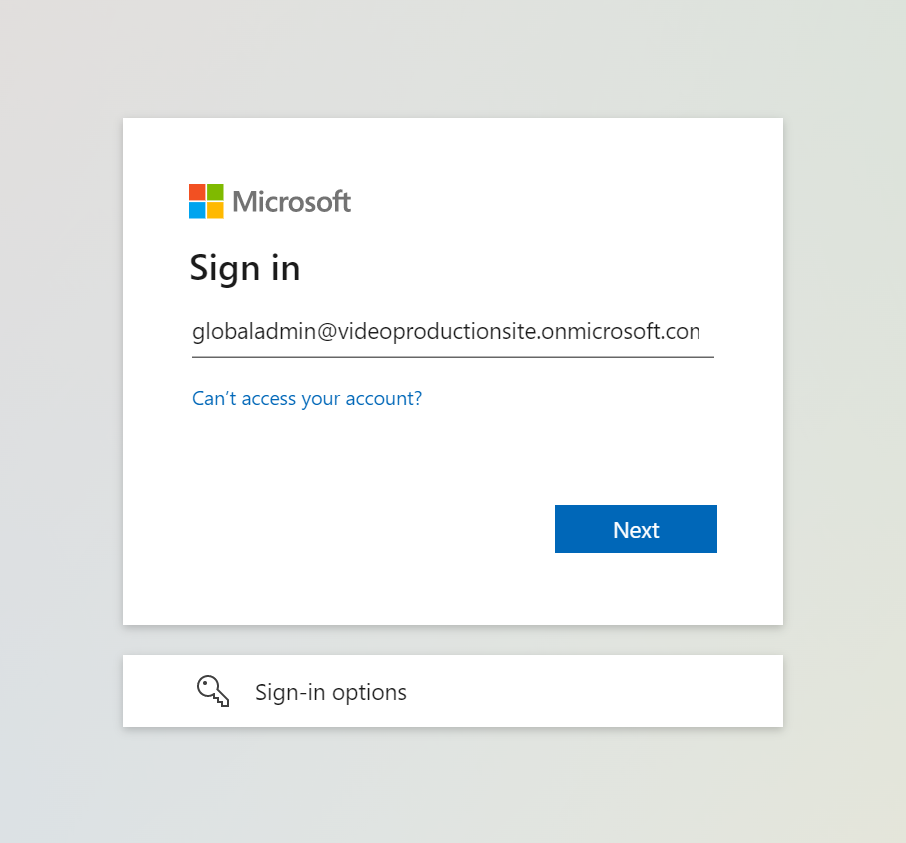
Once logged in the user will get an "Account Activation Success" message, and be redirected to the C2T portal.
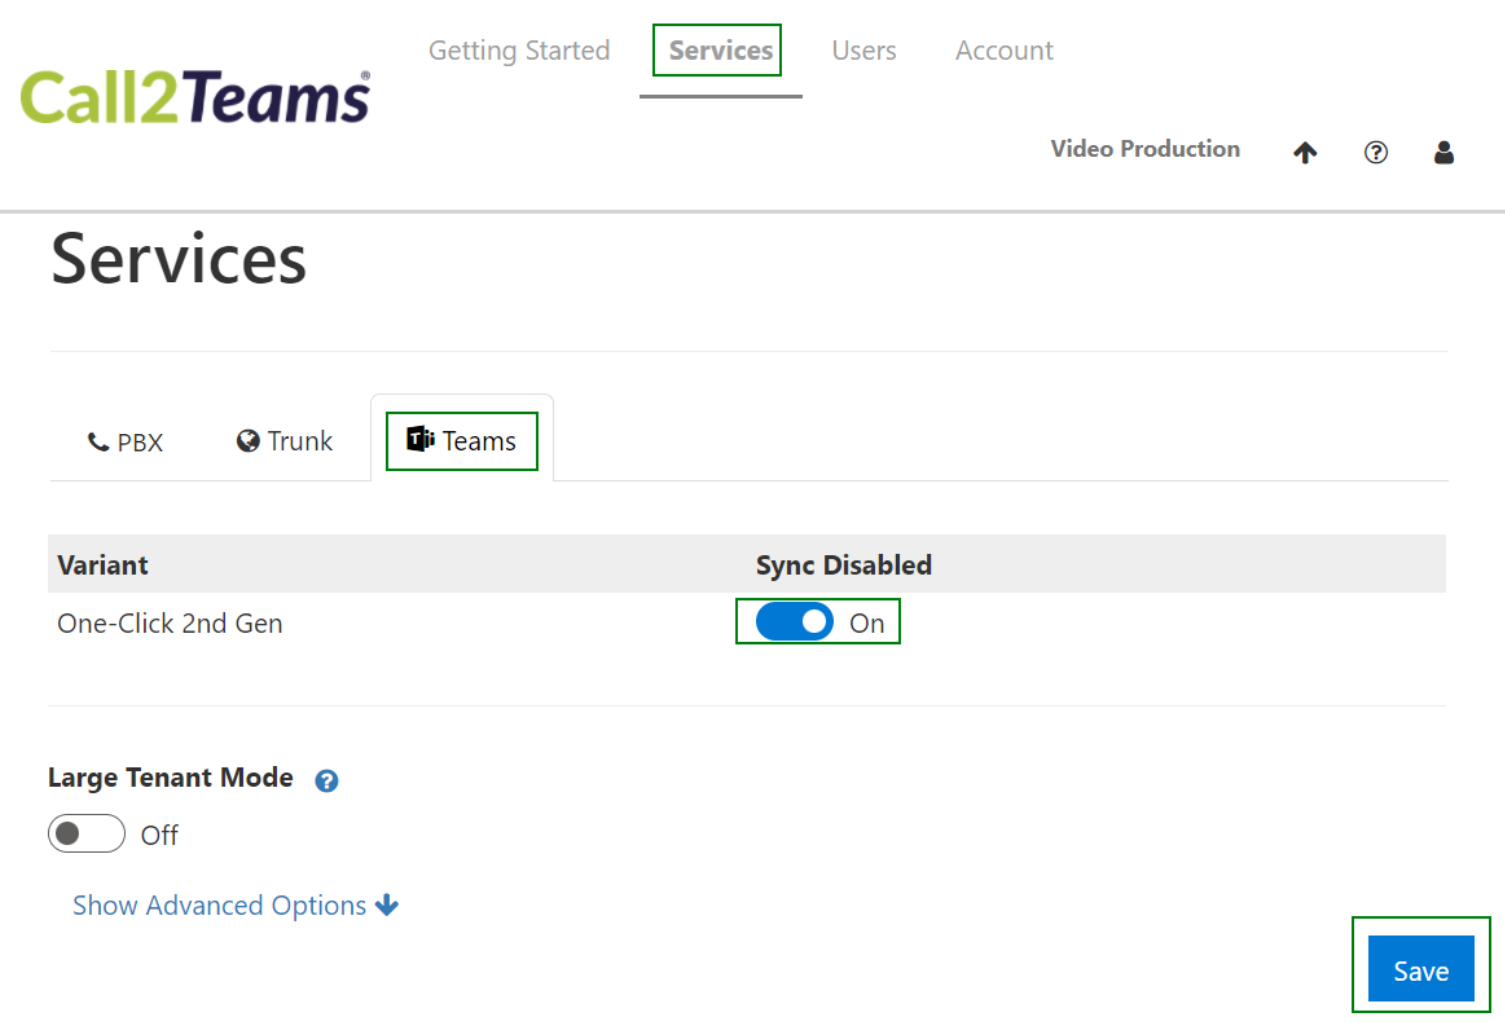
Next the Admin must click on the Services Tab, then the Teams Tab, finally click on the slider for Sync Disabled so that it shows as On and then press Save
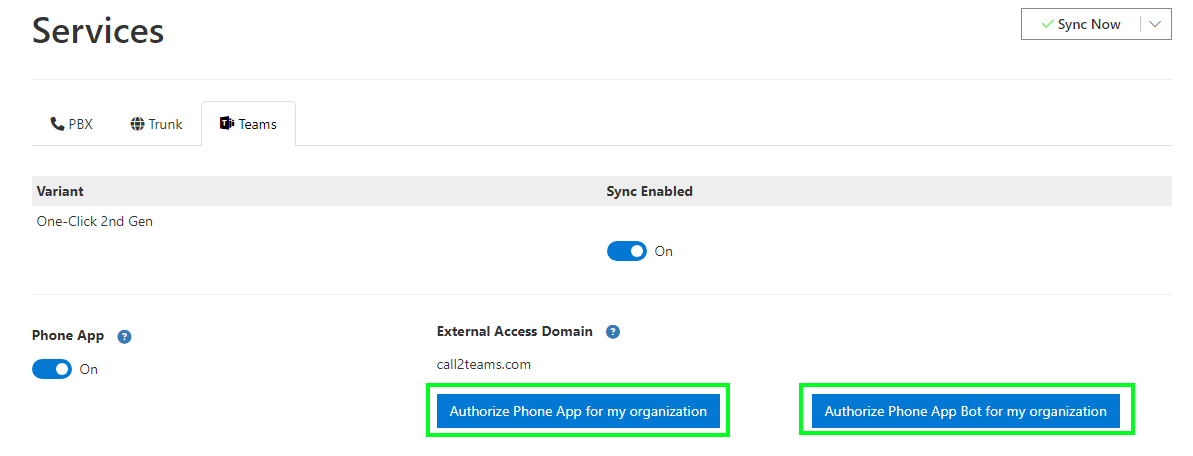
Next the user will be prompted with some permissions boxes that they must accept, When they have done this the initial Call2Teams synchronisation with the MS Teams envrionment will begin. The Sync Now box will show as Syncing
For the Call2Teams Go Integration to work, you must also click on "Authorise Phone App for My Organisation" and "Authorise Phone App Bot for My Organisation"
This initial sync will take approximately 15 mins. If the Sync does not complete this is usually due to the lack of 2 spare MS liceneses as mentioned in the requirements at the start of this document. Either add 2 more or free 2 up and perform the sync again.
When the sync is successful it will show in the portal like this:
At this time the Global Admin can leave Call2teams until the Uboss provisioning user has added the remaining user elements.
Adding Microsoft Teams Calling User Package to a user
Step Three - Assigning to a New User
A Microsoft Teams Calling User C or D package can only be assigned to a hosted user, if the user does not already exist in the portal, when adding please set the User Type to HOSTED in Step 1 of the Add User wizard, and continue the wizard as normal.

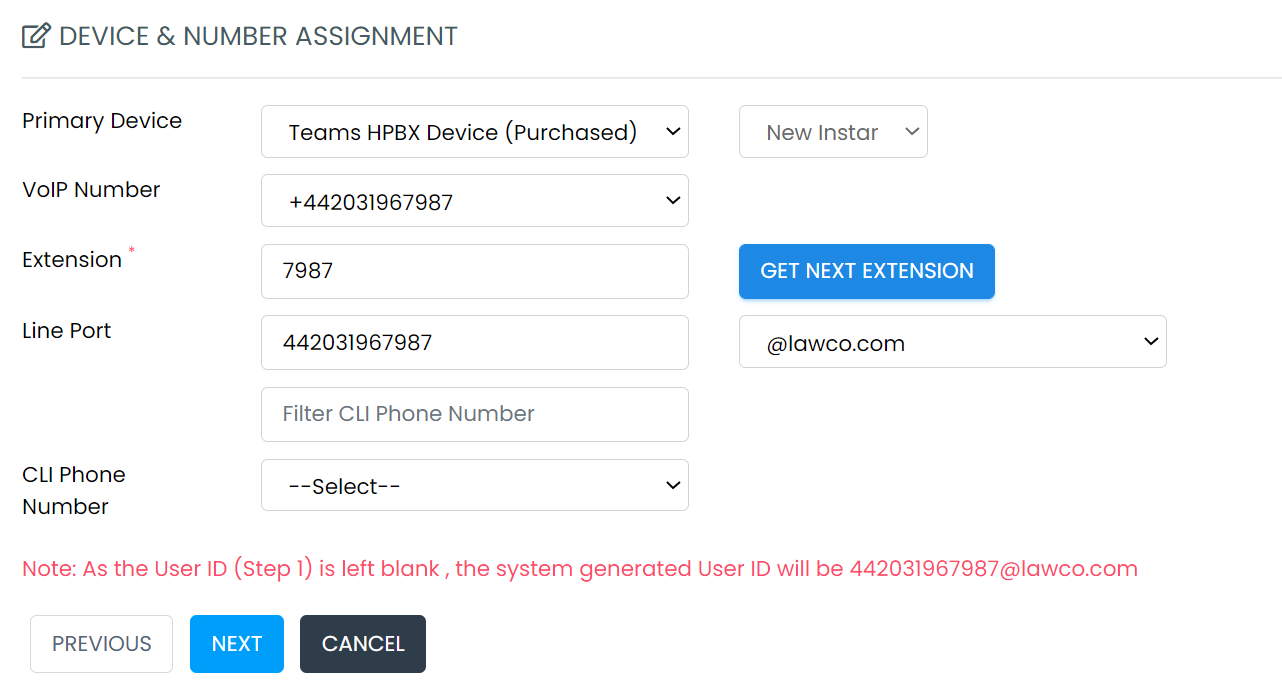
In Step 2 of the Wizard, choose Teams Calling User C or D as a primary package. The Primary Device should be the Teams HPBX Device and make sure you have selected a VoIP Number

In Step 3, add any additional services.
Click FInish on the 4th step of the Wizard. Your new user should add successfully.
Step Four - Assigning to an Existing User
NOTE - For an existing user you must complete the following in order
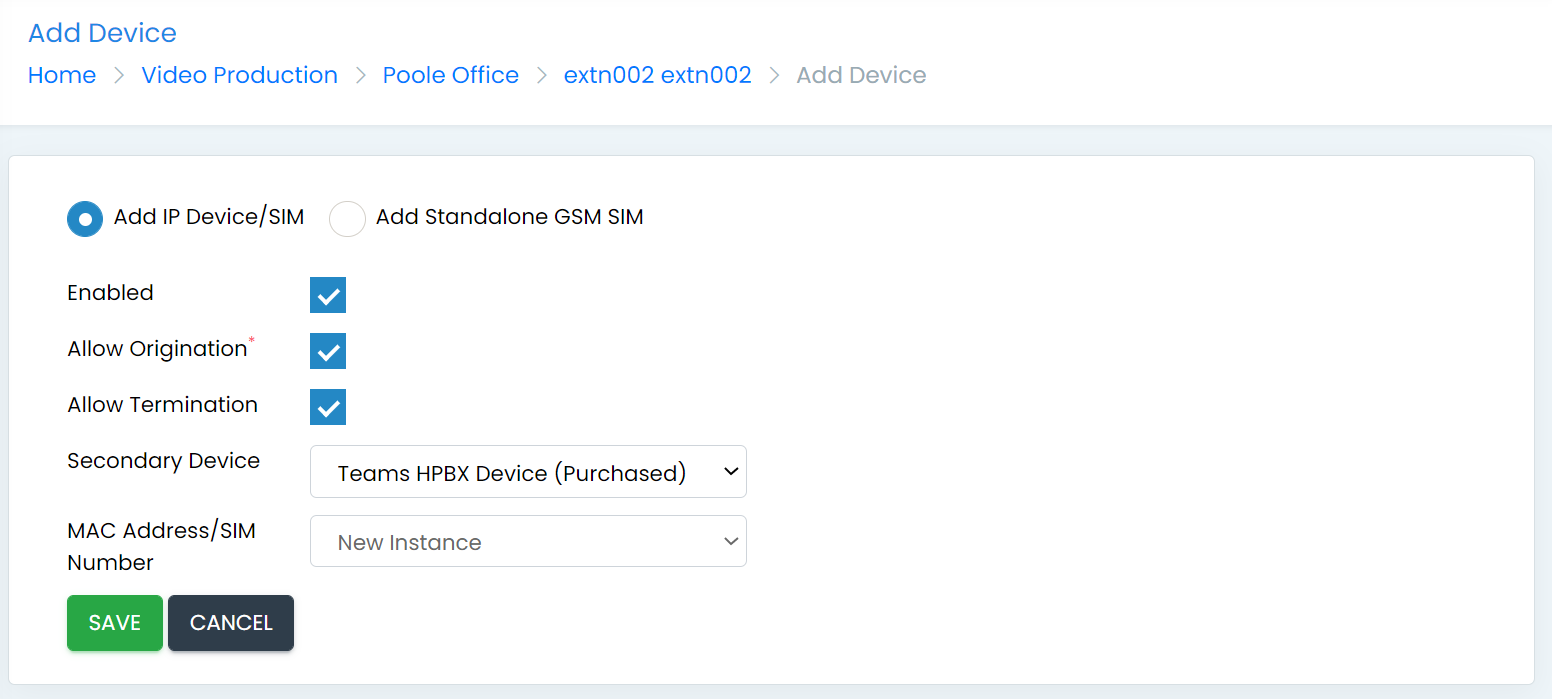
If you are adding this service to an existing Hosted user then go go to the devices Tab, and the Teams HPBX Device (it does not have to be the primary device) and press save.
Next go to the Package & Service Tab and set the primary package to either Microsoft Teams Calling User C or D.

Under the VOIP Account Details tab make sure the user has a DDI and then Save the user.
Step Five - Mapping Uboss Users to Microsoft Teams Users
In this next step we will map the new Microsoft Teams Calling HPBX users to the users that have been pulled through from the Call2teams sync.
Go to Service Assignments at the business level, and find the Microsoft Teams HPBX Business Service.
Click on the Users tab, then the Unmapped Users tab.
This tab shows a list of users on the left from Uboss that have a Microsoft Teams Calling HPBX User service assigned, their VoIP number, and then a dropdown list of all users that are available to be mapped to in MS Teams on the right.

Select the User(s) to map together and then click SAVE . The service will now save, if there are no more Unmapped Users then this screen will now be empty. If the dropdown list does not containt the user that you are looking for then please check with the End Customer that they have correctly assigned a license to the user in the Office 365 portal. If they have already done this or have changed it then they must login to Call2teams and perform a new Sync.
You will see the below when a user is successfully mapped.

The Mapped Users tab will show a list of all the users mappings. If you have incorrectly assigned a Uboss Microsoft Teams Calling HPBX user to the wrong MS Teams user, then you can select and delete them here.

Step 6 - Informing the Customer That a Sync is Required
In the business service, there is a tab Sync Jobs. This tab will show all syncs that have been performed and whether or not they have been successful.
You can also send a Sync Now Email, click on the button and it will email the Global Admin a generic email that tells them to login and perform a Sync Now.
General rule, is that whenever anything is changed in the service, perform a sync.
So once you have mapped the users, perform a sync.

Once you have mapped the users and synced the service is ready to go.
Other Functions in the Business Service
There are 2 other tabs in the business service:
-
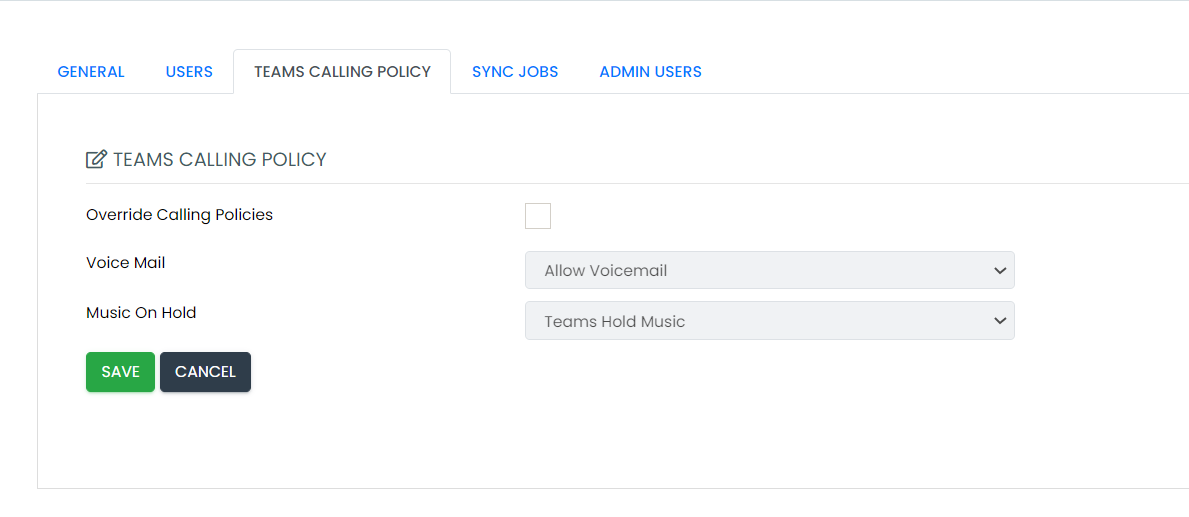
Teams Calling Policy - Within here you have 3 options:
- Override Calling Policies - Select this to edit the 2 dropdowns.
- Voice Mail - Decide whether you want to Use Teams voicemail, Prohibit Teams voicemail and use the Uboss VM, or Prohibit both Teams Voicemail or Call Forwarding
- Music On Hold - Decide whether you want to Use Teams Hold Music or Use the UBoss Hold Music.
-
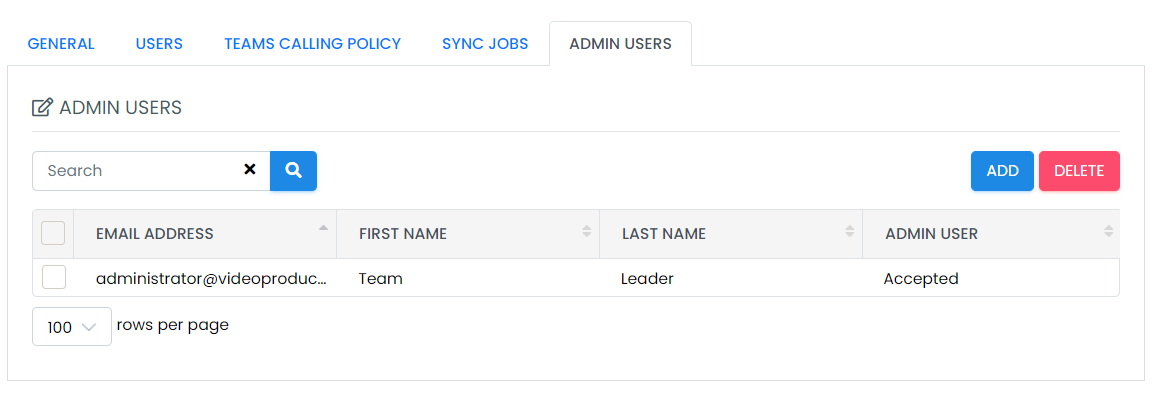
Admin Users - This tab allows you to add futher Microsoft 365 Global Admin Users.
