Cisco SPA112 -
• Connect the ATA to the network via “Internet” port
• Connect analogue phone to the port 1 on the ATA
• Dial ****
• Dial 110#, this will tell you the IP address
Cisco SPA 122 –
• Connect it direct to your laptop using the “ETHERNET” (yellow) port.
• IP address 192.168.15.1
OUT OF THE BOX SETTINGS:
• Enter IP address into browser
• Username – admin, Password – admin
• Once logged on, click the “Voice” tab
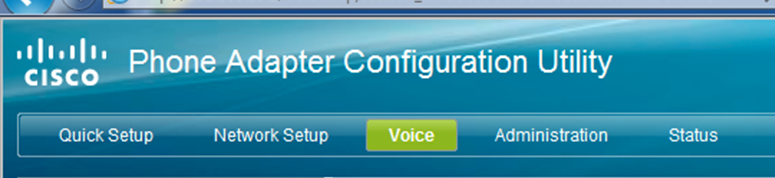
When under the voice tab you want to press the “Line 1” button on the left hand side to configure line 1.
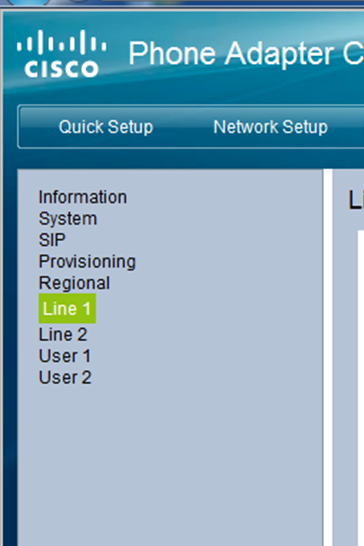
Once in the “Line 1” settings, you only need to add/change configuring in the “Proxy and Registration” and “Subscriber Information” Submenu’s.

IN PROXY AND REGISTRATION:
• Proxy – sbc.insmartcloud.com
• Outbound Proxy leave blank
• Use Outbound Proxy – change to no

IN SUBSCRIBER INFORMATION:
• Display Name – Line Port (upto the @symbol only)
• Password – SIP Password
• Auth ID – SIP Username
• User ID – Line Port (upto the @symbol only)
• Use Auth ID – Change to “yes”
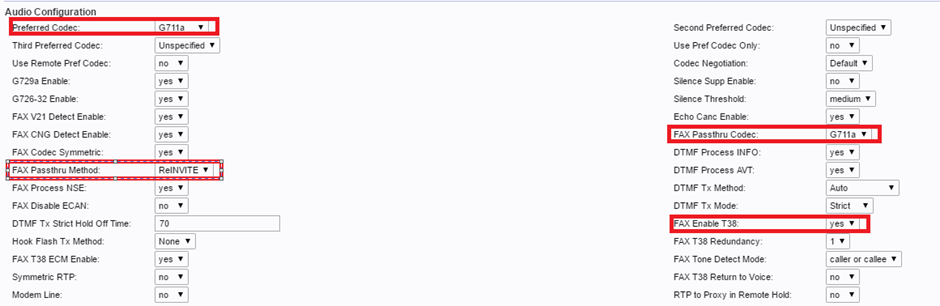
IN AUDIO CONFIGURATION:
• Preferred Codec – G711a
• Fax Passthru Method – Re-INVITE
• Fax Passthru Codec - G711a
• Fax Enable T38 – Yes
Also to get ATA to ATA working you will need to set:
• Use Pref Codec Only – Yes
• Echo cancellation enable – no
Then under the sip section change RTP Packet Size: from 0.030 to 0.020:
